Blog

  • Homemade Fiber Tester

    I needed the ability to conveniently test fiber, and I needed a light source for a light meter at the office. To buy one would have cost us around $600-1200, so I just made one for around $12 and some parts we already had. 🙂

    Parts:

    • I used a multimode to singlemode transceiver we had lying around. This way you can test both MM and SM!
    • 2 slide switches
    • 1 momentary pushbutton switch.
    • 1 9volt battery and battery holder
    • 2 AA batteries and battery holder
    • 1 power plug
    • some extra wire
    • heat shrink tubing
    • project box

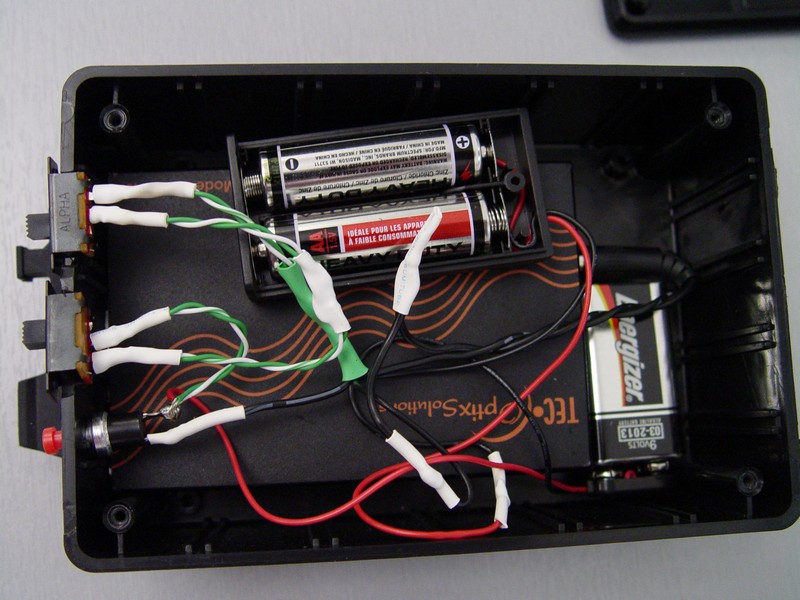
    Here’s the wiring diagram:

    Fiber Tester Wiring Diagram
    Fiber Tester Wiring Diagram

    As you can see the batteries are wired in series. The two slide switches are wired in series also. This allows you to turn the transceiver on steady, but you have to flip two switches to make it happen. Keeps you from accidentally turning it on. The momentary button is also wired into series with the batteries, so you can just give it a quick push to test.

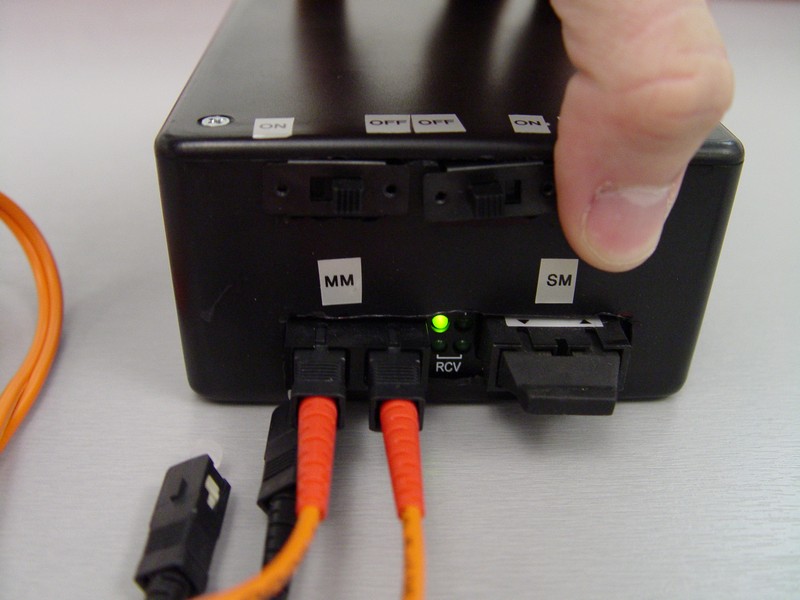
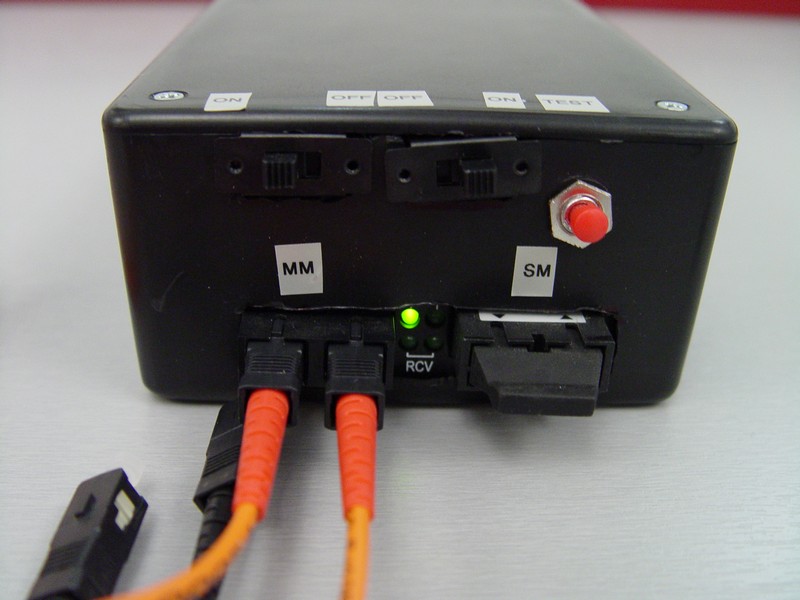
    Here is the finished product:
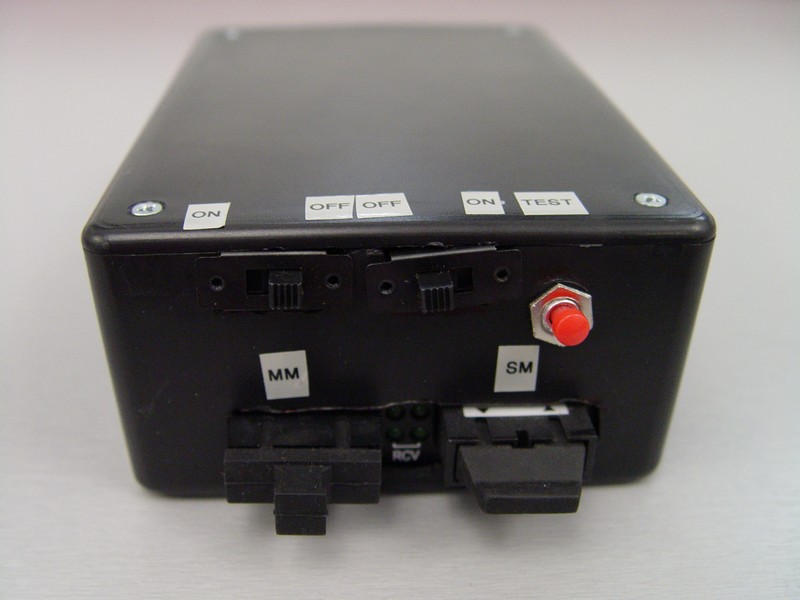
    Front
    Front
    Momentary...light = good.
    Momentary…light = good.
    Slide Switches = more gooder
    Slide Switches = more gooder
    The Guts
    The Guts
  • Solarwinds IP Address Tracker

    My friend Brian was looking for something to keep track of his IP in is smaller enterprise. IPPlan is what we use at the DC/ISP and isn’t precisely tailored for smaller shops. He found this. They have a cute little video that gives you the quick and dirty. This guy doesn’t run as a service natively, but if you have read my Thumb drive articles, you will remember a couple of programs that allow you to do just that.

  • Mikrotik METArouter

    You may have seen metarouter in some of the Mikrotik change logs. First off, what is it?

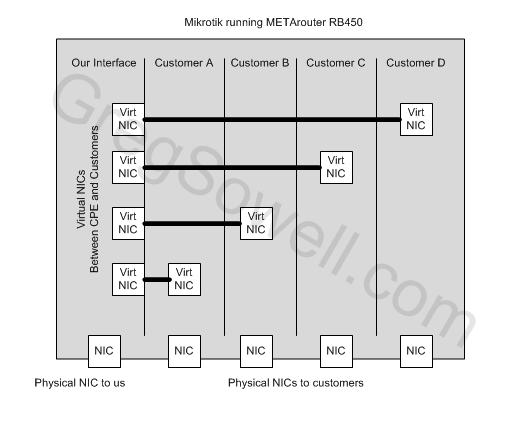
    Metarouter is a way to have logical routers running on your routerboard. In essence, you create a virtual router on your RB, then you assign some interfaces to it. You then can hand this virtual router off to a customer hand allow them to administer it without effecting any of the core functions necessary on the device. I’ve thought of a couple of ways this could be used.

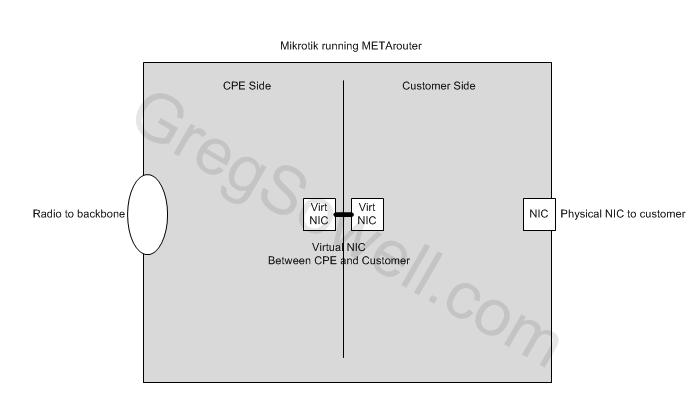
    One would be to segregate a wireless CPE into two. In this way, you can control from the wireless radio back into your core, while the customer can control the ethernet side. This will allow them to forward ports, setup DHCP, manipulate the firewall, all while protecting your backbone.

    METArouter CPE
    METArouter CPE

    Another useful scenario is using an RB450 in a multi-tenant location. Say Ether1 is your internet connection, and you control that port. You create 4 virtual routers, one for each remaining internal port and hand those virtual routers to different customers. On your master router, you create a queue that limits that customer’s traffic.

    METArouter on RB450
    METArouter on RB450

  • Vendor Swag

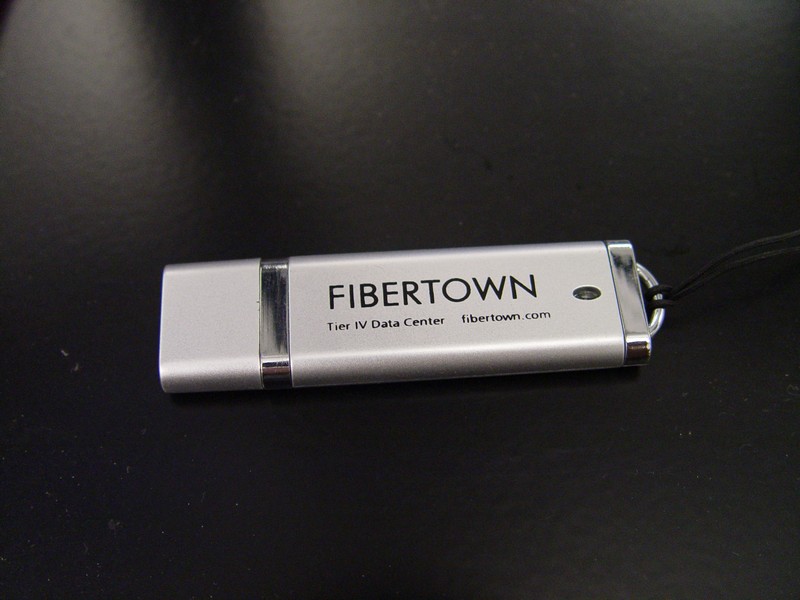
    What kind of stuff do you guys usually get?
    dsc05223
    dsc05224

    1GB USB
    1GB USB

  • Cisco NAT FTP to same IP as Overload

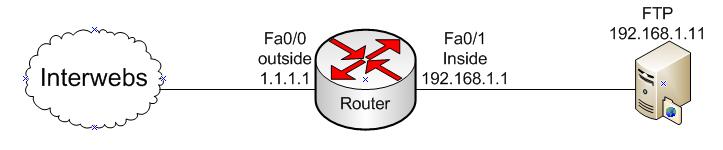
    The idea for this tutorial is you only have a /30 on our outside interface. You have an FTP server on the inside of your network you want to make publicly accessible. What we are going to do is NAT the FTP port on the outside interface to our FTP server on the inside. We will do all of this while still NAT Overloading on that same IP.

    ciscoftpnat

    interface fa0/0
     desc outside-interface
     ip address 1.1.1.1 255.255.255.252
     ip nat outside
    !
    interface fa0/1
     desc inside-interface
     ip address 192.168.1.1 255.255.255.0
     ip nat inside
    !
    ip route 0.0.0.0 0.0.0.0 1.1.1.2
    !
    ip access-list extended nat
     permit ip 192.168.1.0 0.0.0.255 any
    !
    ip nat inside source list nat interface fastEthernet 0/0 overload
    !Here's where the magic begins.  We are doing our specific FTP NATs below.
    ip nat inside source static tcp 192.168.1.11 21 interface FastEthernet0/0 21
    ip nat inside source static tcp 192.168.1.11 20 interface FastEthernet0/0 20

    You’ll notice that the two last lines are where everything happens. You are basically saying everything that comes in the outside interface destined for ports 21 and 20 to redirect to the specific inside host of 192.168.1.11.

    ip nat inside source static tcp 192.168.1.11 21 interface FastEthernet0/0 21
    ip nat inside source static tcp 192.168.1.11 20 interface FastEthernet0/0 20
  • Where are you from?

    I was looking at my analytics and I noticed that France is my #2 traffic source. USA is #1, which I would assume is because my site is over here in the US written in the Englishes. France, I didn’t see coming…you guys totally snuck up on me.

    It seems most people are visiting from around Paris. I’m not sure exactly what content you guys are looking at…more Mikrotik or more Cacti. I think more cacti.

    Only thing more surprising is my #3, which is Brazil. 🙂 I don’t know why any of this is surprising, I really didn’t know what to expect.

    Finally at #4 is the UK. I would have figured they would be #2. Since we sort of speak the same language…just without all that bob’s your uncle, pip pip and cheerio stuff. 😛 Just kidding my limey friends. Any of you guys have a place for me to stay; I would love to come visit?

    1. United States
    2. France
    3. Brazil
    4. United Kingdom
    5. Germany
    6. Australia
    7. Poland
    8. Indonesia
    9. Russia
    10. Canada

  • Mikrotik NAT FTP to same IP as Masquerade

    MTK FTP NAT
    MTK FTP NAT
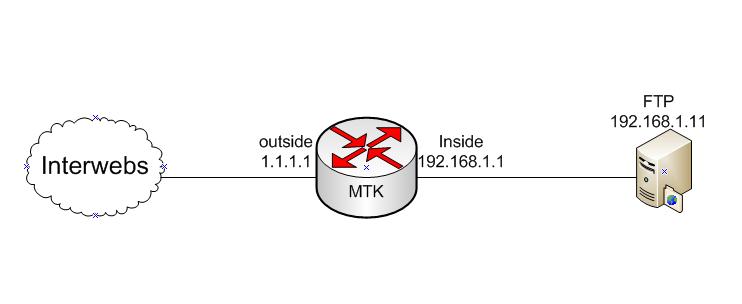
    The idea is that you have a single public IP on your Mikrotik. You want to grab anyone on the internet heading to your IP for FTP and redirect them to an internal FTP server.

    The first thing you want to do is disable the FTP server on the Mikrotik.

    ip service disable ftp

    Next, you need to redirect port 20 and 21 to your internal FTP server. The public facing interface is named “outside”. The public IP bound to the router is 1.1.1.1. The private internal IP of the FTP server is 192.168.1.11.

    chain=dstnat action=netmap to-addresses=192.168.1.11 to-ports=21 protocol=tcp src-address=0.0.0.0/0 dst-address=1.1.1.1 in-interface=outside dst-port=21 
    chain=dstnat action=netmap to-addresses=192.168.1.11 to-ports=20 protocol=tcp src-address=0.0.0.0/0 dst-address=1.1.1.1 in-interface=outside dst-port=20

    As you can see I use chain dstnat and action of netmap. I also specified incoming interface.