Believe it or not, I covered connecting HashiCorp Vault to Ansible Tower about five years ago. Things have changed since then; it’s Ansible Automation Platform 2.6 now, not Tower, but the core idea holds up just fine moving forward: don’t store secrets in AAP at all. Store them in Vault, and let AAP reach out and grab them at run time.
A Vault Secrets Engine is really just a server off to the side that you query to pull secrets from: passwords, API keys, tokens, SSH keys, I mean literally anything you want to store in there. And AAP is happy to use it. So let’s walk through the whole thing, Vault side first, then over to AAP, and I’ll give you the CLI commands along the way for the parts that the Vault UI can’t actually do for you.
Video Demo
Playbook Repo
Here’s a quick link to my playbook repository.
Setting Up the Secrets Engine (KV) in Vault
Over in Vault, click into Secrets Engine and hit Enable Engine. Pick KV from the Generic section, and give it a path. Mine is just secret. While you’re in there, expand Method Options, and in the Version dropdown select 2. You want the newer KV engine, not the original, since it’s what gives you versioned secrets and the metadata endpoints we’ll lean on later. Scroll down and click Enable Engine to finish.
Storing the Secrets
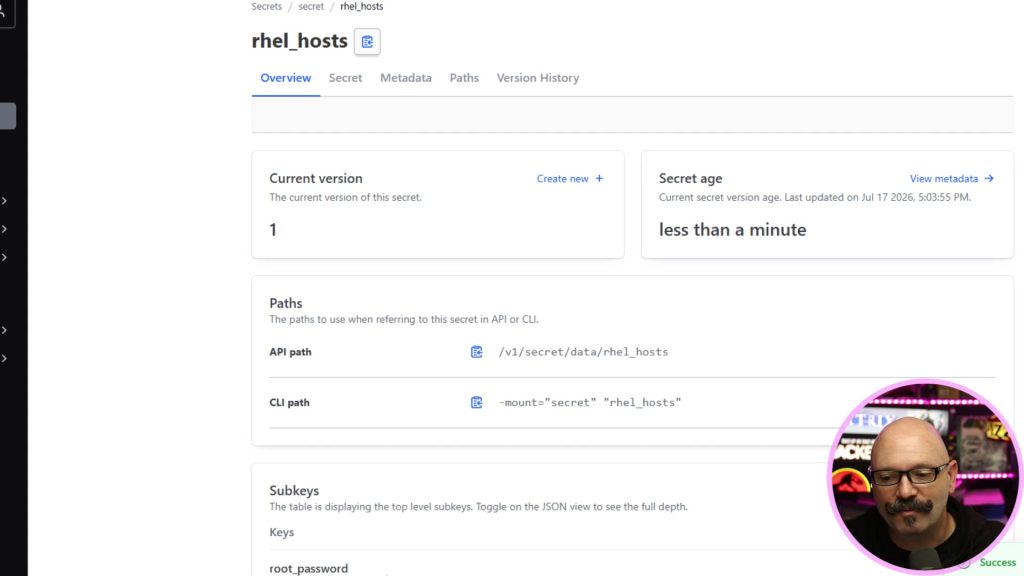
Once the engine is up, click Create secret and give it a path. I named mine rhel_hosts. Inside it I added two keys:
root_password, the value a machine credential will use to log into the target hostspecial_key, just a second value to prove you can pull more than one secret out of the same path
Click Save and you’re done. A single secret path can hold as many key/value pairs as you want.
If you’d rather sanity check it from the command line instead of clicking around the UI, SSH into your Vault box and run:
vault kv get secret/rhel_hostsYou should see both root_password and special_key come back in the output.
Locking Down Access with an ACL Policy
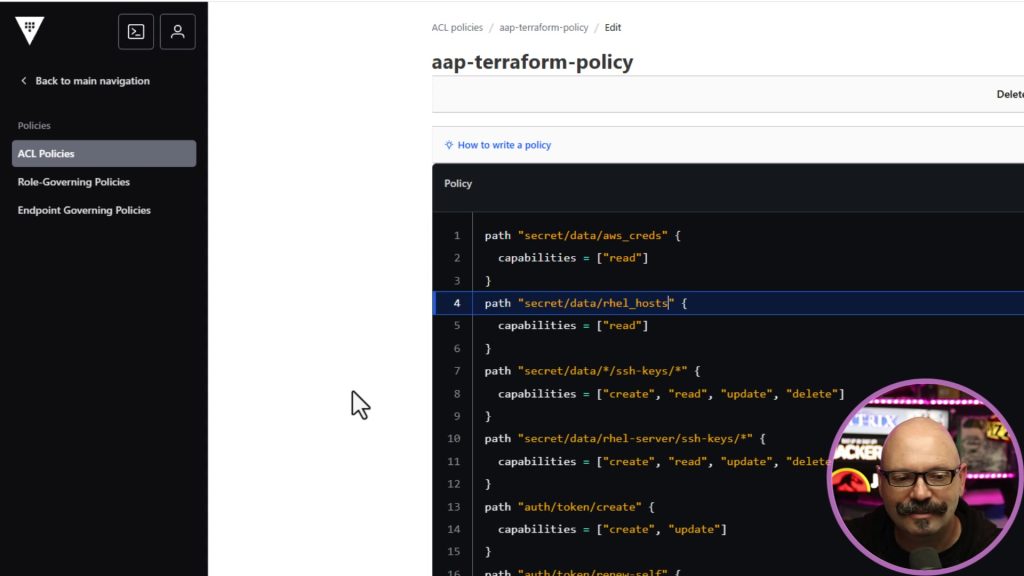
Before anything can read that secret, it needs permission. That’s what a policy is for. Click Policies, then ACL Policies in the left menu, then Create ACL policy (or edit an existing one, which is what I did since I already had a policy named aap-terraform-policy from using this same Vault for Terraform). Paste in a policy body like this:
# Read the rhel_hosts secret
path "secret/data/rhel_hosts" {
  capabilities = ["read"]
}

# Let AAP see, list, and read metadata for that secret
path "secret/metadata/rhel_hosts" {
  capabilities = ["list", "read"]
}

# Allow the AppRole to create and manage its own child tokens
path "auth/token/create" {
  capabilities = ["create", "update"]
}

path "auth/token/renew-self" {
  capabilities = ["update"]
}

path "auth/token/lookup-self" {
  capabilities = ["read"]
}
That first block is the one that actually matters for this demo. It grants read-only access to secret/data/rhel_hosts, nothing more. The token blocks underneath just make sure the AppRole token AAP gets back can renew and look up itself properly. If you end up storing more than one secret path, add another path block the same way, one per path. Click Create policy when you’re done.
Enabling AppRole Authentication
Now, click Access in the left menu, then Authentication Methods, then Enable new method on the right. Pick the AppRole tile. Leave the path at its default of approle and click Enable method.
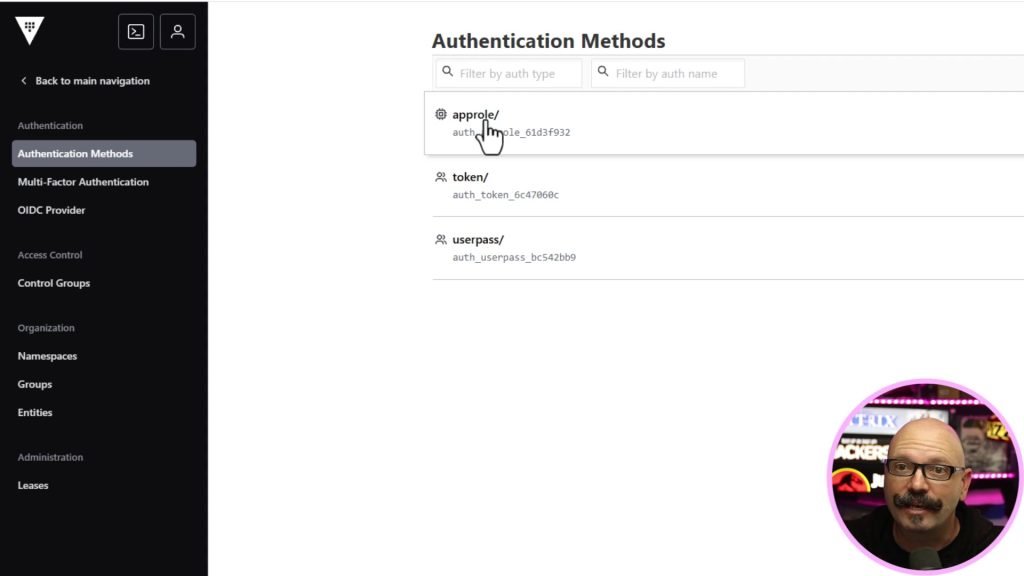
You could authenticate with a plain username and password instead, but AppRole lets you get a lot more granular. You can restrict things like which IP ranges are allowed to authenticate. For a machine-to-machine integration like this one, it’s the right call.
Here’s the catch, though. The Vault UI only supports enabling the AppRole method. Actually creating the role itself, the thing AAP will authenticate as, has to happen from the Vault CLI. This is the part of the video I said gets a little more involved.
Creating the AppRole from the CLI
SSH into your Vault server and point the CLI at your Vault address:
ssh rhel@vault

export VAULT_ADDR=http://127.0.0.1:8200
vault login -address=$VAULT_ADDR -method=userpass username=admin
It’ll prompt you for the admin password interactively, so you’re not typing it in plain text on the command line. Once you’re logged in, create the role and tie it to the policy you just wrote:
vault write auth/approle/role/aap token_policies="aap-terraform-policy"You should get back Success! Data written to: auth/approle/role/aap. Now pull the Role ID:
vault read auth/approle/role/aap/role-idAnd generate a Secret ID for it:
vault write -f auth/approle/role/aap/secret-idCopy both of those values somewhere safe. You’ll need them in just a second over in AAP. If you want to prove the AppRole actually works before you leave the terminal, test it right here:
vault write auth/approle/login \
  role_id=<role-id-from-above> \
  secret_id=<secret-id-from-above>
If that comes back with a token and a set of key/value pairs instead of an error, the AppRole is good to go.
What It Looks Like Before Vault Is Wired Up
Back in AAP, I have a job template called gregsowell-vault-test that uses two credentials pulling from Vault: a machine credential for login, and a custom “Special Key” credential just to prove a second secret can flow through. Before those credentials are actually mapped to anything in Vault, running the template fails immediately:
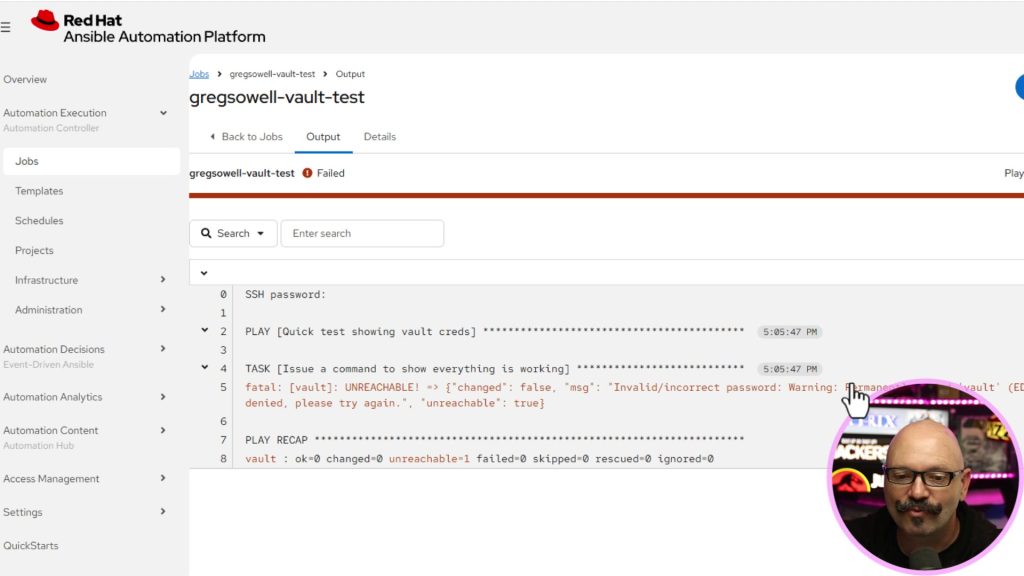
That’s expected, since the credential fields are still empty. Everything from here on is what makes that job succeed.
Creating the HashiCorp Vault Secret Lookup Credential in AAP
In AAP, click Automation Execution in the left menu, then Infrastructure, then Credentials, then Create credential on the right. For Credential Type, select HashiCorp Vault Secret Lookup. Think of this credential as a proxy. It’s not tied to any one secret, it’s just how AAP authenticates to Vault, and every other credential that needs a Vault-backed value will hop through this one. Fill in:
- Server URL, how AAP reaches your Vault instance
- AppRole role_id and AppRole secret_id, the two values you copied from the CLI a minute ago
- Path to Auth, set to
approle, matching the mount path we enabled - API Version, set to
v2, since that’s the KV engine version we enabled
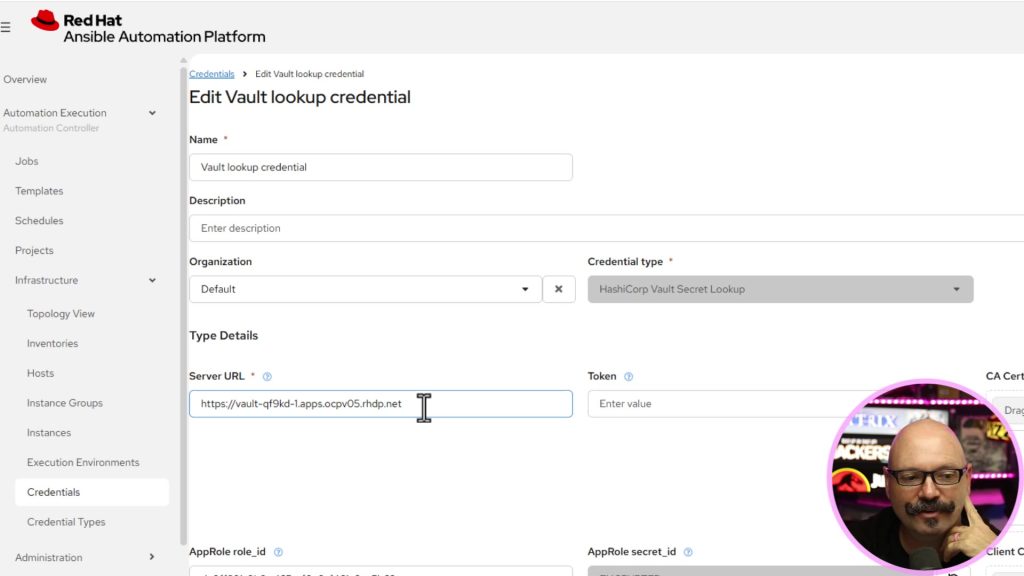
Click Create credential to save it, then go back in and click Test to make sure it can actually reach Vault and authenticate. Since we already created the secret and the policy that lets this role read it, that test should come back green.
Building a Custom Credential Type for Extra Secrets
The machine credential’s password field is a first-class citizen. AAP already knows how to map it to an external secret. But what if you want to pull an arbitrary value out of Vault that doesn’t correspond to a built-in credential field? That’s what a custom credential type is for.
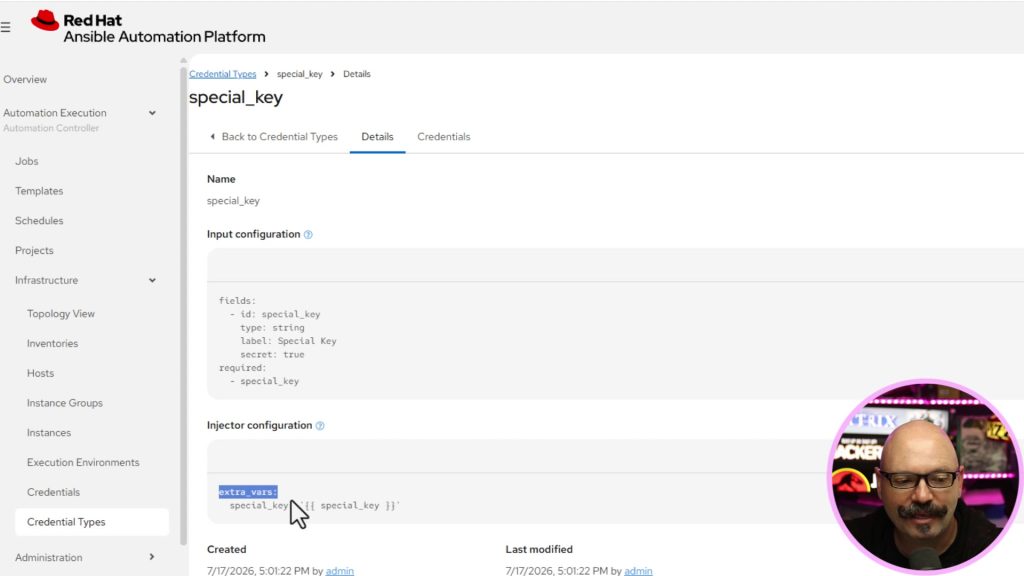
I created one called special_key with a single input field. The important part is the injector configuration, which controls how that value gets used once it’s retrieved. Mine injects it as an extra var:
extra_vars:
  special_key: '{{ special_key }}'
Extra vars sit at the top of Ansible’s variable precedence, so this will override any variable of the same name defined elsewhere.
Mapping Individual Credential Fields to Vault Secrets
This is the step that actually ties everything together. Individual credentials don’t automatically know which key inside a Vault secret they should pull. You have to map each field explicitly.
Edit the credential (starting with the machine credential), find the field you want populated from Vault, and click the small key icon next to it. That opens the Secret Management System picker:
- Under Select external credential, choose the Vault lookup credential you just created
- Fill out the metadata fields: Name of Secret Backend (
secret), Path to Secret (rhel_hosts), Path to Auth (approle), and Key Name (root_password) - Click Test before saving. It’ll catch a typo immediately instead of leaving you to debug a failed job later
- Click Finish, then save the credential
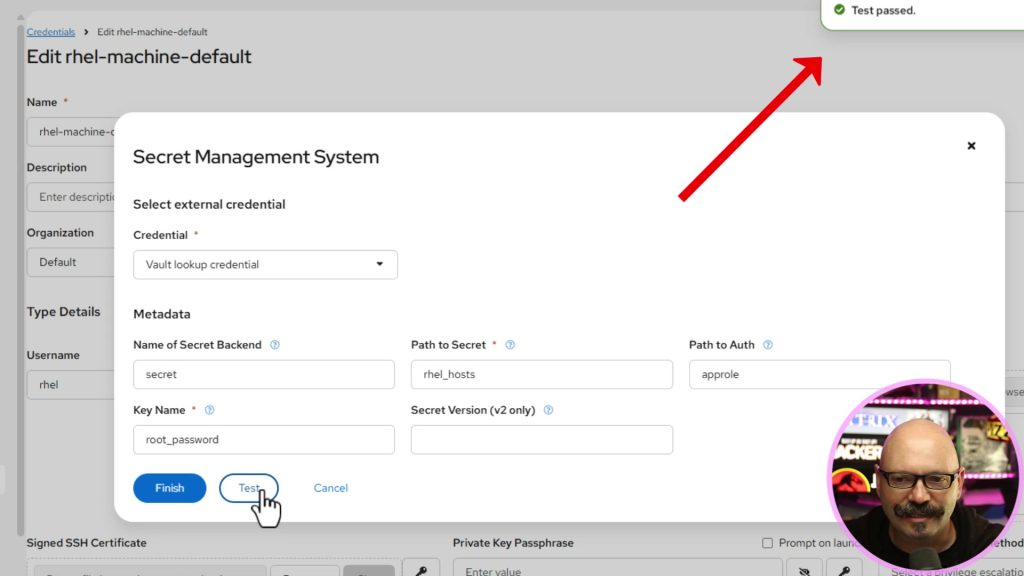
Repeat the exact same process for the Special Key credential. Same Vault lookup credential, same secret path, but with Key Name set to special_key instead.
Testing It All Out
With both credentials mapped, I fired off the same job template again. This time it authenticates to Vault, runs a quick hostname command, and displays the special key value:
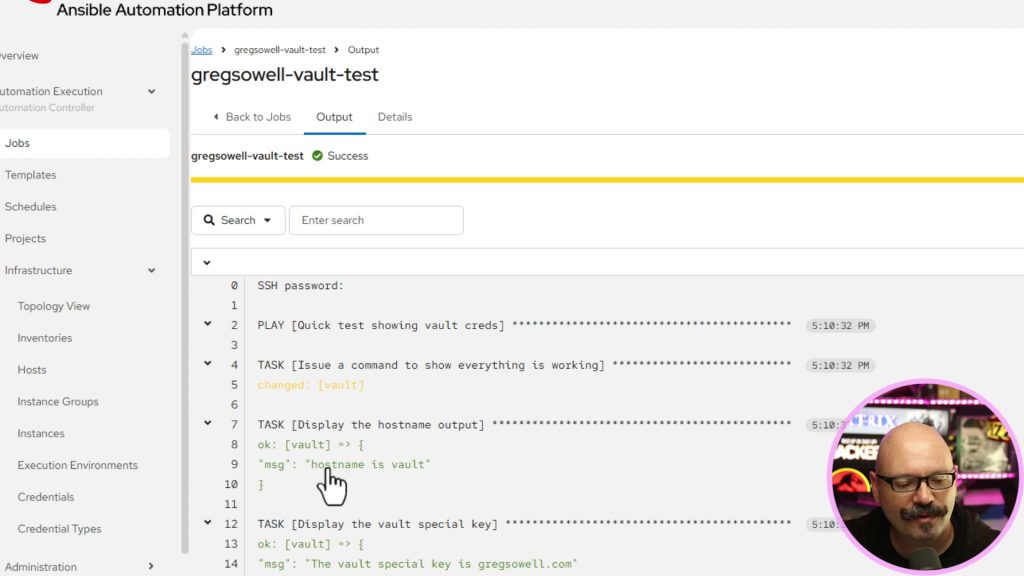
The hostname comes back as vault, the name of the target machine, and the special key prints out exactly what we stored in the secrets engine. Neither value was ever typed into AAP.
Why This Is Worth the Setup
Once these credentials are mapped, you never have to touch them again. Rotate a password or key inside Vault, and AAP automatically inherits the new value on the next run. There’s nothing to update on the AAP side.
This also plays really well with configuration as code. When you rebuild your AAP configuration from code, none of it contains plaintext secrets, because none of it ever did. The credential objects just carry the Vault path mappings. The only genuinely sensitive values that have to exist anywhere in your code are the AppRole role_id and secret_id on that one Vault lookup credential, and even those can be handled separately from the rest of your config.
It’s a small amount of setup for a real reduction in what your security team has to worry about.
Additional Resources
- Integrate third-party secret management systems, AAP 2.6 docs
- Secret management system, AAP 2.6 Configuring automation execution
- AppRole auth method, HashiCorp Vault docs
If you’re setting this up differently in your own environment, or you’ve found a cleaner way to handle any of these steps, I’d love to hear about it in the comments. Happy automating, happy secrets engineering.
Leave a Reply