Automating VMware Alternatives With Ansible And Ascender
I have personally used and had good success with VMware for nearly two decades. While it is a good product, I occasionally have folks talk about some alternatives, and how viable they are. For this article/demo I’m going to use Proxmox VE, which is a competent/user friendly hypervisor. Really, I’m going to examine this question from an automation perspective.
First, and most importantly, the user experience is exactly the same no matter what hypervisor you use. This means your users can smoothly transition from one platform to the other with no knowledge that anything has changed.
The backend, using Ansible and Ascender, will have different playbooks, which means you will be using different modules, and often some slightly different procedures, but frequently they aren’t so different.
Demo Video
Interfaces Compared
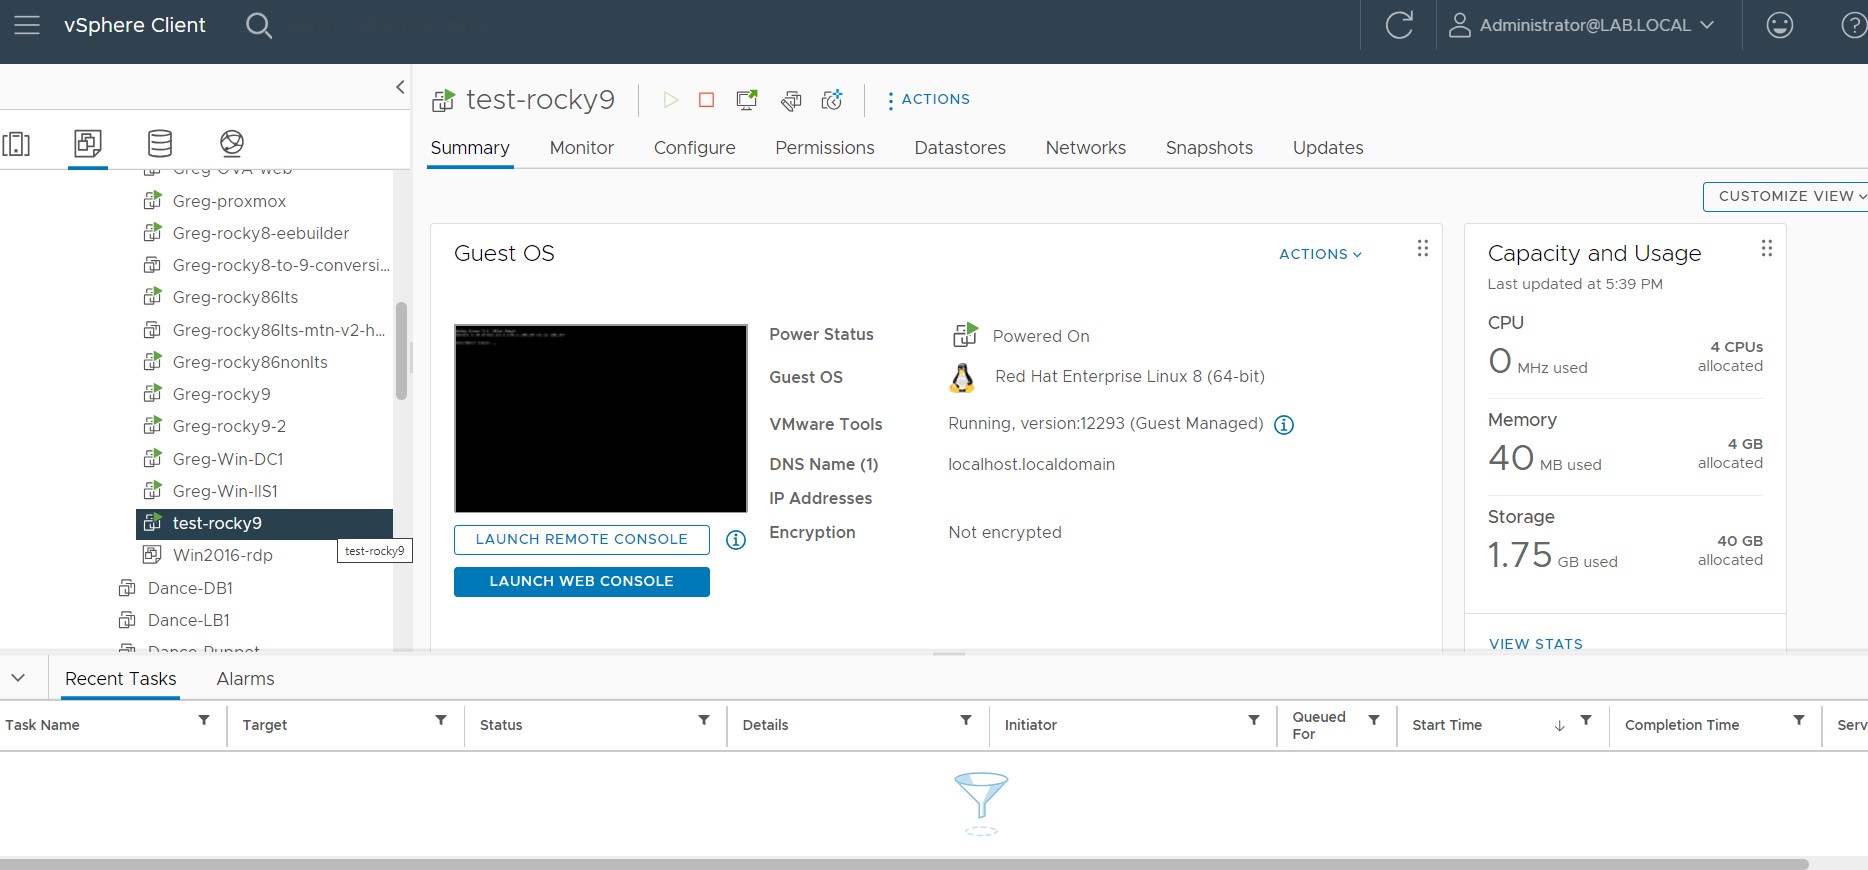
VMware’s Vcenter has been a pretty consistent interface for a while now:
Proxmox VE may be new to you, but the interface should look and feel awfully familiar:
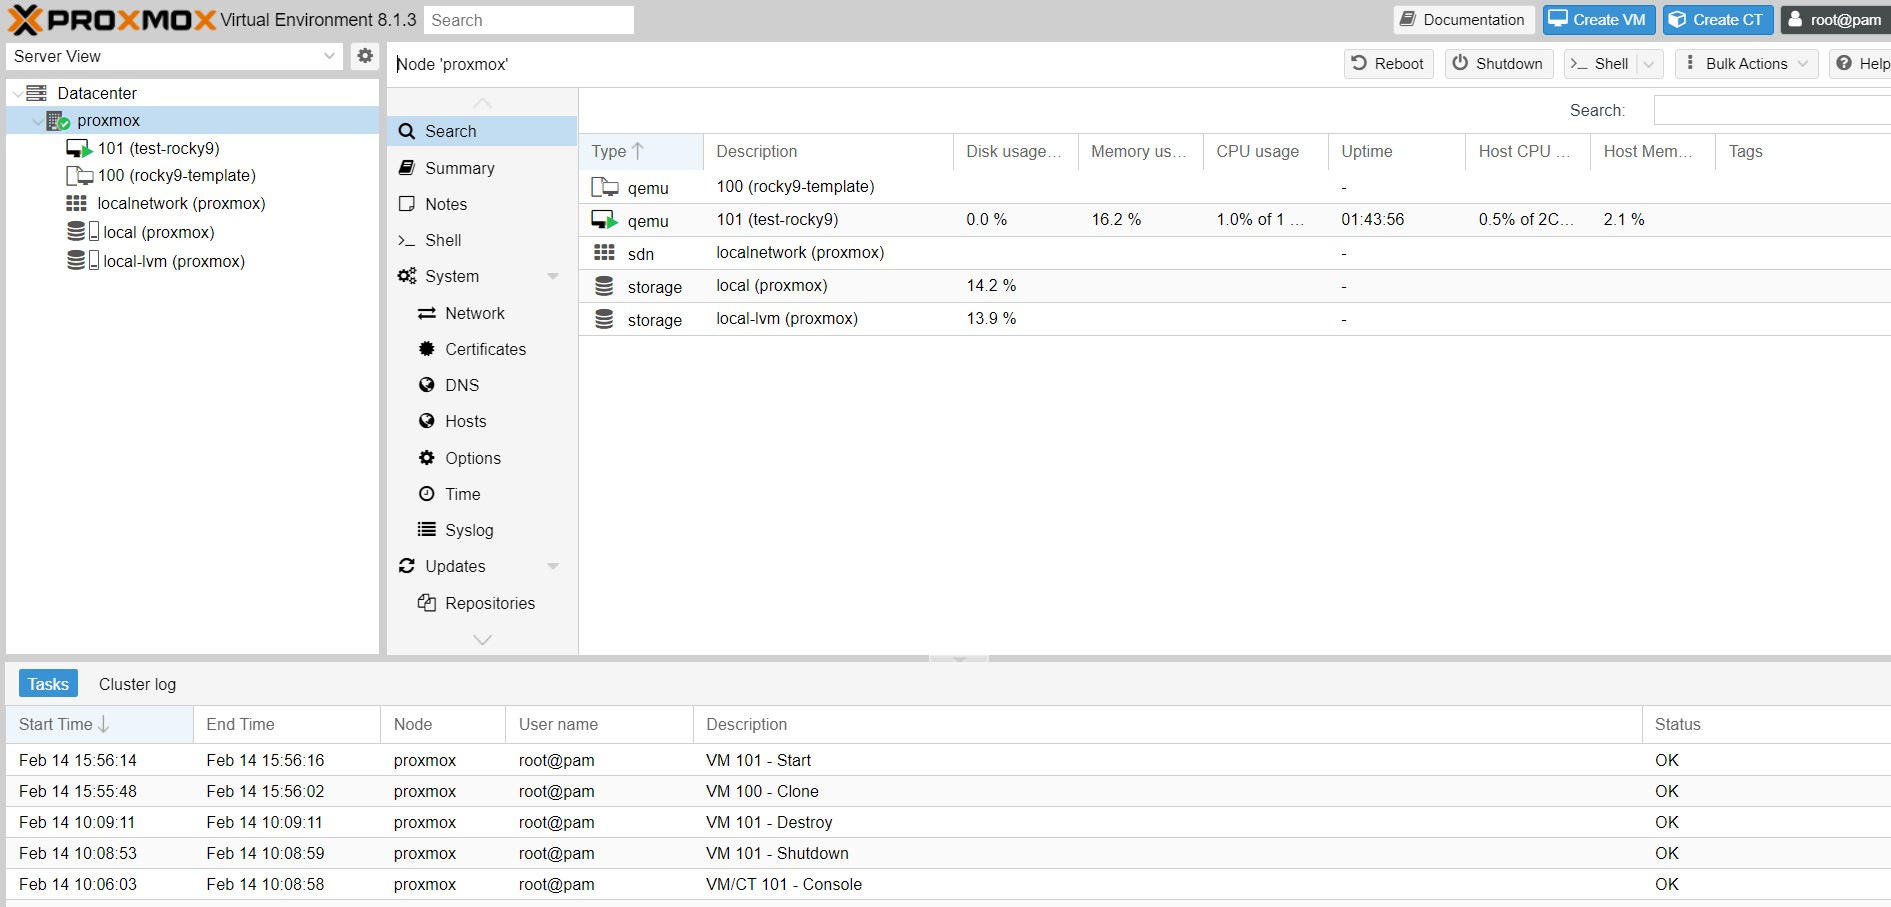
They both will very similarly allow you to access and edit settings, add/delete VMs and templates…BUT, who wants to manage infrastructure manually?
Playbooks Compared
You can find my Proxmox playbooks here, and my VMware playbooks are here.
The two playbooks in question, one for Proxmox and one for VMware, are structured very similarly, but use their respective modules.
I’m going to breakdown and comment on each playbook below.
Proxmox Playbook(proxmox-vm.yml)
---
- name: Create and control VMs on Proxmox using Ascender
  hosts: localhost
  gather_facts: false
  vars:
    # Configure the api connection info for Proxmox host
    proxmox_auth: &proxmox_auth
      api_host: proxmox.gregsowell.com
      api_user: "{{ gen1_user }}"
      # api_user: root@pam # username format example
      # Use standard password
      api_password: "{{ gen1_pword }}"
      # Use api token and secret - example format
      # api_token_id: gregisa5.0
      # api_token_secret: 72a72987-ff68-44f1-9fee-c09adaaecf4d
Above I use a concept in YAML known as an anchor. In every task below I will reference this anchor with an alias. This essentially allows me to reference a set of options and inject them in various other places in my playbook. An anchor is set via the & symbol, which says “everything else after this is part of the anchor.”
Here I’m setting up the authentication. I have examples of doing username / password or using an api token. Notice that for username and password I’m using variables. This is because I’m passing in a custom credential via Ascender to the playbook at run time. Doing this allows me to securely maintain those credentials in the Ascender database.
    # Configure template to clone for new vm
    clone_template: rocky9-template

    # Configure location on Host to store new vm
    storage_location: local-lvm

    # Linked Clone needs format=unspecified and full=false
    # Format of new VM
    vm_format: qcow2

    # Default name to use for the VM
    vm_name: test-rocky9

    # How many cores
    # vm_cores: 2

    # How many vcpus:
    # vm_vcpus: 2

    # Options for specifying network interface type
    #vm_net0: 'virtio,bridge=vmbr0'

    #vm_ipconfig0: 'ip=192.168.1.1/24,gw=192.168.1.1'
Above here you can see that I’m setting up defaults for my standard variables that can be overridden at run time. Remember that if you pass in variables as extra_vars they have the highest level of precedence.
    # Switches for playbook control
    # vm_action: provision
    # vm_action: start
    # vm_action: stop
    # vm_action: delete


  tasks:
  - name: Block for creating a vm
    when: vm_action == "provision"
    block:
    - name: Create a VM based on a template
      community.general.proxmox_kvm:
        # api_user: root@pam
        # api_password: secret
        # api_host: helldorado
        <<: *proxmox_auth
        clone: "{{ clone_template }}"
        name: "{{ vm_name }}"
        node: proxmox
        storage: "{{ storage_location }}"
        format: "{{ vm_format }}"
        timeout: 500
        cores: "{{ vm_cores | default(omit) }}"
        vcpus: "{{ vm_vcpus | default(omit) }}"
        net:
          net0: "{{ vm_net0 | default(omit) }}"
        ipconfig:
          ipconfig0: "{{ vm_ipconfig0 | default(omit) }}"
      register: vm_provision_info

    - name: Pause after provision to give the API a chance to catch up
      ansible.builtin.pause:
        seconds: 10
Here you can see my first two tasks. I’m looking for the vm_action variable to be set to provision, and if it is I will run this block of code. I’ll then clone a template. Here I’m doing a full clone, but I could also set it to be a linked clone if I wanted. You can also see I have some customization variables here, that when not set are omitted. After the VM provisions, it will pause for about 10 seconds to give the system time to register the new VM before it proceeds on.
This is also where you see the anchor being referenced. The “<<: *proxmox_auth” is the alias with override. This will take the variable chunk from above and inject it into this module(which makes modification to it easier and saves several lines of code in each task).
  - name: Start VM
    when: (vm_action == "provision" and vm_provision_info.changed) or vm_action == "start"
    community.general.proxmox_kvm:
      <<: *proxmox_auth
      name: "{{ vm_name }}"
      node: proxmox
      state: started
You can see in this start task that I have two conditionals. One if the vm_action is set to start and one if the action is set to provision and it actually made a change when doing the provision. It does this on the provision task because by default when you clone a template it won’t be started. We also check for the changed status because the clone operation is idempotent, which means if that VM already exists, it won’t do anything, it will simply report back “ok”.
  - name: Stop VM
    when: vm_action == "stop"
    community.general.proxmox_kvm:
      <<: *proxmox_auth
      name: "{{ vm_name }}"
      node: proxmox
      state: stopped

  - name: Delete VM block
    when: vm_action == "delete"
    block:
    - name: Stop VM with force
      community.general.proxmox_kvm:
        <<: *proxmox_auth
        name: "{{ vm_name }}"
        node: proxmox
        state: stopped
        force: true

    - name: Pause to allow shutdown to complete
      ansible.builtin.pause:
        seconds: 10

    - name: Delete VM
      community.general.proxmox_kvm:
        <<: *proxmox_auth
        name: "{{ vm_name }}"
        node: proxmox
        state: absent
The delete block isn’t too complex. It first stops the VM, pauses so the system will register the change, then performs the delete from disk.
VMware Playbook(vmware-vm.yml)
Compare and contrast the two playbooks: they are laid out almost identically, the tasks are in the same order, and they are configured almost the same. This means transitioning from one to the other should be pretty seamless.
---
- name: Create and control VMs on VMware using Ascender
  hosts: localhost
  gather_facts: false
  vars:
    # below are all of the details for the VM.  I'm overriding these at runtime.
    vm_datacenter: MNS
    vm_name: snowtest2
#    vm_template: Windows2016
    vm_template: Rocky8.6
#    vm_template: Rocky8
#    vm_template: Rocky9
    vm_folder: /Greg/ciq
    vm_disksize: 50
    vm_datastore: SSD
    # minimum of 4GB of RAM
    vm_memory: 4096
    vm_cpus: 4
    vm_netname: Greg
    vm_ip: 10.1.12.56
    vm_netmask: 255.255.255.0
    vm_gateway: 10.1.12.1

    vmware_auth: &vmware_auth
      hostname: "{{ vcenter_hostname }}"
      username: "{{ gen1_user }}"
      password: "{{ gen1_pword }}"
      validate_certs: no

    # Switches for playbook control
    # vm_action: provision
    # vm_action: start
    # vm_action: stop
    # vm_action: delete


  tasks:
  - name: Provision a VM
    when: vm_action == "provision"
    community.vmware.vmware_guest:
      <<: *vmware_auth
      folder: "{{ vm_folder }}"
      name: "{{ vm_name }}"
      datacenter: "{{ vm_datacenter }}"
      state: poweredon
#      guest_id: centos64Guest
      template: "{{ vm_template }}"
  # This is hostname of particular ESXi server on which user wants VM to be deployed
      disk:
      - size_gb: "{{ vm_disksize }}"
        type: thin
        datastore: "{{ vm_datastore }}"
      hardware:
        memory_mb: "{{ vm_memory }}"
        num_cpus: "{{ vm_cpus}}"
        scsi: paravirtual
      networks:
      - name: "{{ vm_netname}}"
        connected: true
        start_connected: true
        type: dhcp
        # type: static
        # ip: "{{ vm_ip }}"
        # netmask: "{{ vm_netmask }}"
        # gateway: "{{ vm_gateway }}"
        # dns_servers: "{{ vm_gateway }}"
#      wait_for_ip_address: true
#        device_type: vmxnet3
    register: deploy_vm

  - name: Start a VM
    when: vm_action == "start"
    community.vmware.vmware_guest:
      <<: *vmware_auth
      folder: "{{ vm_folder }}"
      name: "{{ vm_name }}"
      datacenter: "{{ vm_datacenter }}"
      state: poweredon

  - name: Stop a VM
    when: vm_action == "stop"
    community.vmware.vmware_guest:
      <<: *vmware_auth
      folder: "{{ vm_folder }}"
      name: "{{ vm_name }}"
      datacenter: "{{ vm_datacenter }}"
      # state: poweredoff
      state: shutdownguest

  - name: Delete a VM
    when: vm_action == "delete"
    community.vmware.vmware_guest:
      <<: *vmware_auth
      folder: "{{ vm_folder }}"
      name: "{{ vm_name }}"
      datacenter: "{{ vm_datacenter }}"
      state: absent
      force: true
Interface Comparison In Ascender
For my job templates(how you pull your playbook and required components together in Ascender) I’m using something called a survey. This allows you to quickly/easily configure a set of questions for the user to answer before the automation is run. Here’s an example of my VMware survey:
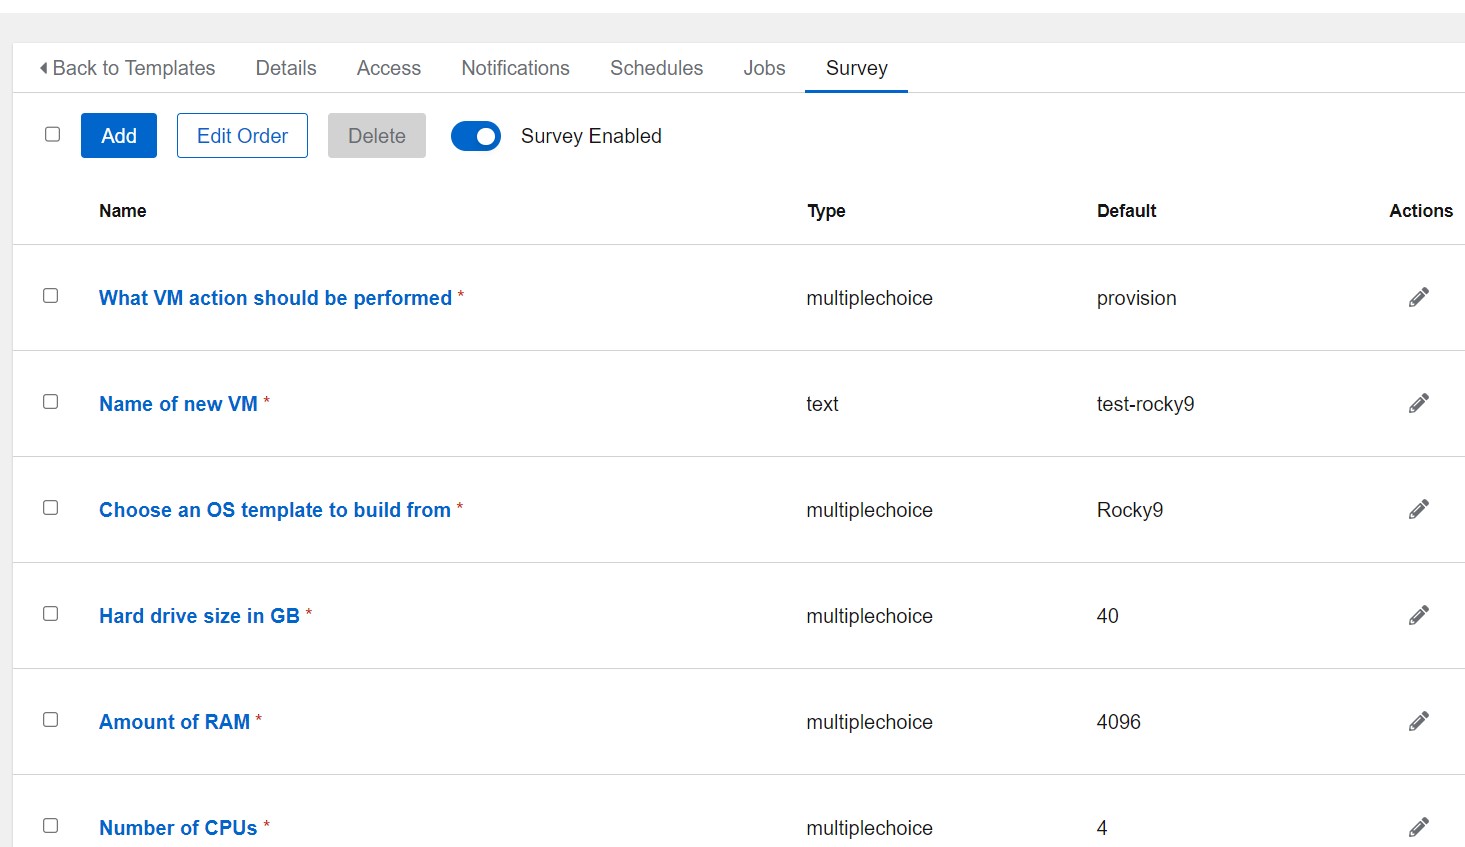
Adding an entry is as simple as clicking add and filling in the blanks:

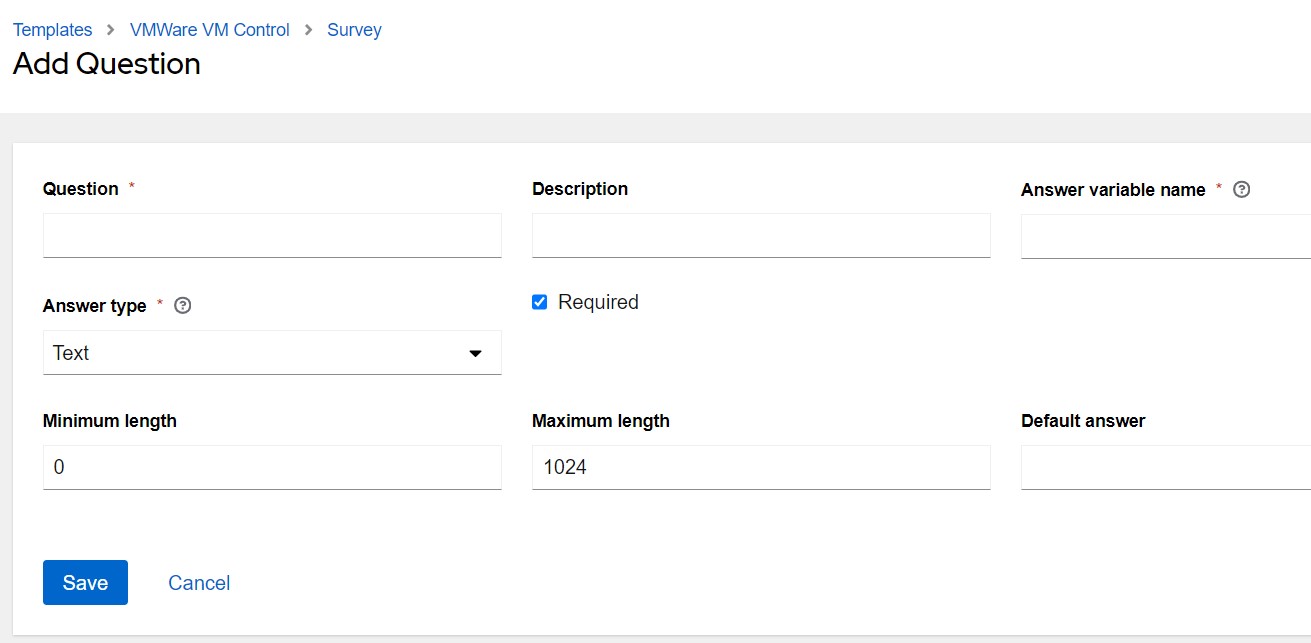
Notice in the above there is a blank space for “Answer variable name”. This is the extra_vars variable that the info will be passed to the playbook with. That’s how these surveys work; they simply pass info to the playbook as an extra_var.
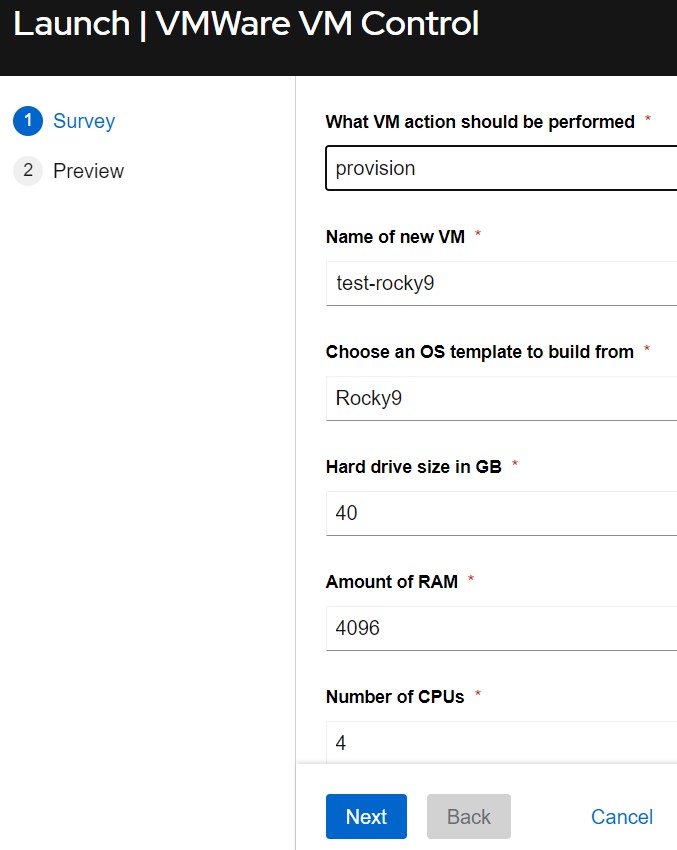
So for the sake of comparison, here’s what it looks like when you launch the two different job templates:
VMware Job Template:
Proxmox Job Template:
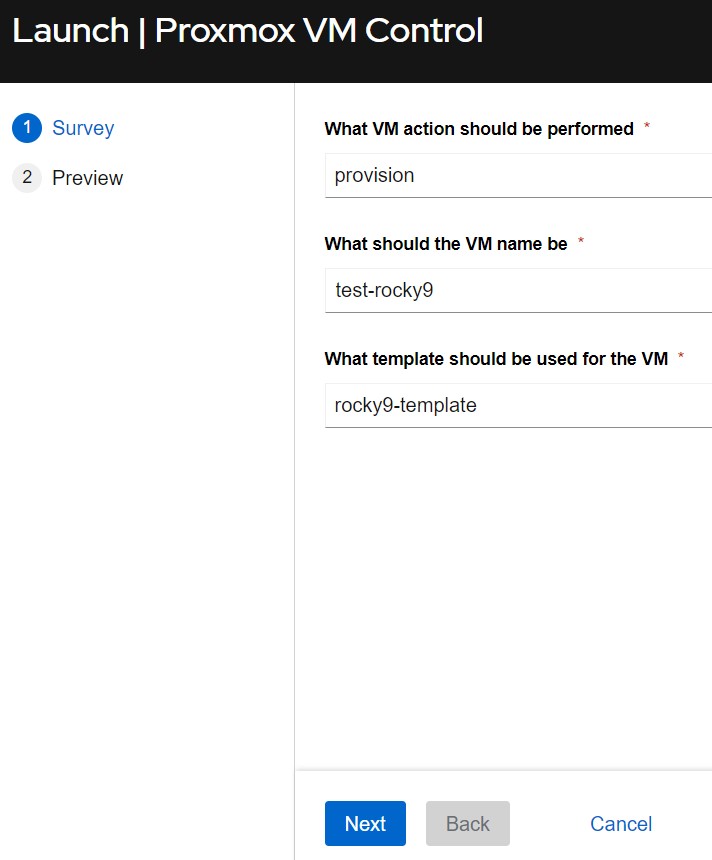
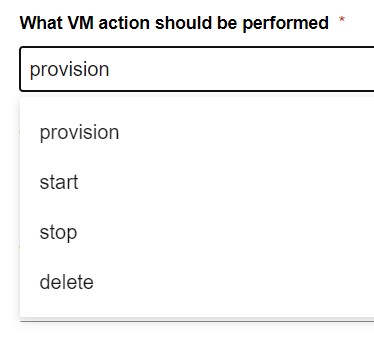
Notice how they are almost identical. I added all of the options to the VMware JT, but I kept the Proxmox one a little cleaner. I could have just as easily added all of the knobs, but I wanted to show how you can make them full featured or simple. In the end they accomplish the same task. You put in the VM’s name, choose an action to perform, and add any additional data required. That’s literally all there is to it!
When I say choose an action it’s as easy as this:
Conclusion
Now this should just serve to show you how easy it is to automate different hypervisors. Keep in mind that this example is simple, but can easily be expanded to easily automate virtually all of the functions of your virtual environment.
As always, I’m looking for feedback. How would you use this in your environment…how would you tweak or tune this?
CIQ also does professional services, so if you need help building, configuring, or migrating your automation strategy, environments, or systems, please reach out!
Thanks and happy automating!
Leave a Reply