
Performance co-pilot(PCP) is a suite of tools used for performance monitoring for a variety of things. We see it used quite a bit in the HPC space to either squeeze as much performance out of a system as possible or to troubleshoot performance issues. It can often be tedious to install and manage…unless, of course, you use automation!
I’ll describe my architecture, review my playbooks, and have a look at it all working.
Video Demo
How It Works
PCP has a LOT of components and options, I really intend to just describe how I’m configuring it.
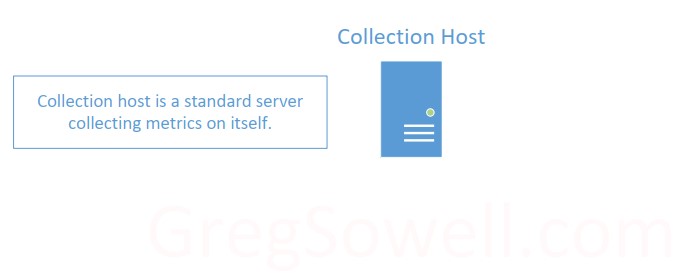
First, what is a “Collection host”? Any regular server or VM running PCP to gather info on itself is considered a collection host. So most of the configured hosts will be collection hosts.
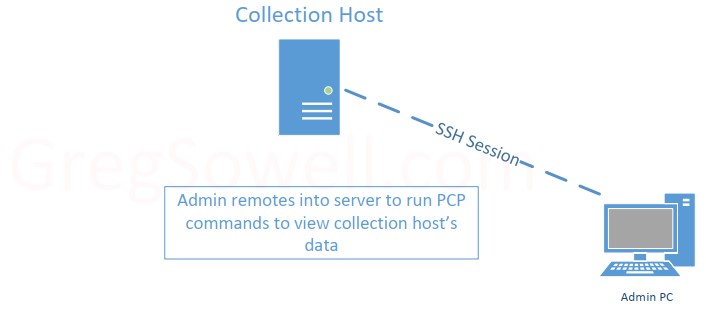
Once a collector is configured an admin will generally SSH into it to access the PCP data. These hosts can also run something like redis with grafana to graph info, which means the admin is going straight to the host either way.
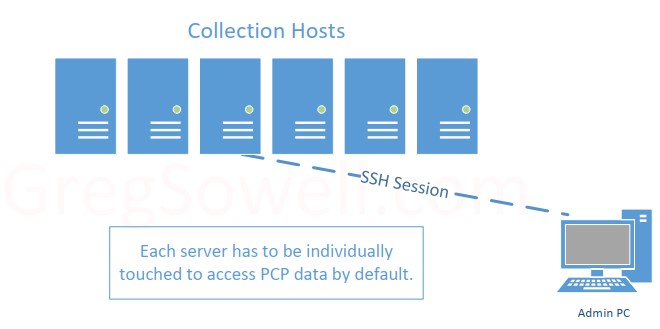
When your environment begins to grow it can be a bit tedious to connect to each host to access PCP info.

This is where a “Monitoring Host” comes in. A monitoring host stores info from multiple collection hosts. This means an admin only needs to connect to the monitoring host to gain insight about any of the collection hosts…a one-stop-shop as it were.
You can either push or pull data. If you push data from the collectors they will incur some additional overhead. If you pull from the monitoring host, it will incur the additional cost, which is less likely to skew your performance metrics from the collection hosts.
I’ve also seen some data saying that a monitoring host should be capped somewhere around a thousand collectors.
Playbooks
All of my playbooks can be found here in my git repository.
pcp-install.yml. This playbook connects to PCP collectors and configures them to both collect locally and prepares them to allow monitoring hosts to access them:
---
- name: Install/configure PCP on various hosts
  hosts: pcp-hosts
  gather_facts: false
  vars:
    # Services to be enabled/started
    enable_services:
      - pmcd
      - pmlogger

    # The subnets or ranges of hosts allowed to connect to clients to fetch info
    remote_subnets:
      - 10.0.*
      - 192.168.5.10

  tasks:
  # dnf install required pcp packages
  - name: Install pcp packages
    ansible.builtin.dnf:
      name: "{{ item }}"
      state: latest
    loop:
      - pcp
      - pcp-system-tools
    notify: restart pcp

  - name: Configure the pmcd process(add all of the allowed subnets)
    ansible.builtin.blockinfile:
      path: /etc/pcp/pmcd/pmcd.conf
      block: "{{ lookup('ansible.builtin.template', 'pmcd-access.j2') }}"
      insertafter: "\\[access\\]"
    notify: restart pcp

  - name: Configure the pmcd options to listen on the correct IP
    ansible.builtin.lineinfile:
      path: /etc/pcp/pmcd/pmcd.options
      line: "-i {{ hostvars[inventory_hostname].ansible_host }}"

  - name: Enable pmcd listening ports on firewall
    ansible.posix.firewalld:
      port: 44321/tcp
      permanent: true
      immediate: true
      state: enabled
    ignore_errors: true

  - name: Enable selinux for pmcd services
    ansible.builtin.shell: "{{ item }}"
    ignore_errors: true
    loop:
      - setsebool -P pcp_read_generic_logs on
      - setsebool -P pcp_bind_all_unreserved_ports on

  - name: Start and enable pcp services
    ansible.builtin.service:
      name: "{{ item }}"
      state: started
      enabled: true
    loop: "{{ enable_services }}"

  handlers:
  - name: restart pcp
    ansible.builtin.service:
      name: "{{ item }}"
      state: restarted
    loop: "{{ enable_services }}"
I’m going to point out some things of note in the above playbook.
First is the remote_subnets variable. This should be populated with the IP or subnet of your monitoring hosts. It’s essentially an access list of who is allowed to connect in to retrieve PCP data.
Most of the tasks are pretty straightforward, but I thought I would have a look at one that includes a jinja2 template:
  - name: Configure the pmcd process(add all of the allowed subnets)
    ansible.builtin.blockinfile:
      path: /etc/pcp/pmcd/pmcd.conf
      block: "{{ lookup('ansible.builtin.template', 'pmcd-access.j2') }}"
      insertafter: "\\[access\\]"
    notify: restart pcp
This replaces a block of code using the blockinfile module, but I’m pulling that block from a dynamic j2 template(in the templates folder) named pmcd-access.j2:
{% for item in remote_subnets %}
allow hosts {{ item }} : fetch;
{% endfor %}
Taking a look at the template above you can see I have a simple “for loop”. I loop over the contents of remote_subnets and fill out the allow hosts section based on it. Anything inside of {% %} is omitted from the actual output of the template.
Now that the PCP collectors are installed and configured, I’ll run the pcp-monitor.yml playbook to configure the monitor host:
---
- name: Install/configure PCP monitor host
  hosts: pcp-monitor
  gather_facts: false
  vars:
    # Services to be enabled/started
    enable_services:
#      - pmcd
      - pmlogger

    collection_directory: /var/log/pcp/pmlogger/

    # Do you want to set the pmlogger config files to use host IP address instead of inventory_hostname
    config_via_host: true

  tasks:
  # - name: debug data
  #   ansible.builtin.debug:
  #     var: hostvars[item]
  #   loop: "{{ groups['pcp-hosts'] }}"

  - name: Install pcp packages
    ansible.builtin.dnf:
      name: "{{ item }}"
      state: latest
    loop:
      - pcp
      - pcp-system-tools
    notify: restart pcp

  - name: Create config file for each pcp-host
    ansible.builtin.template:
      src: pmlogger-monitor.j2
      dest: "/etc/pcp/pmlogger/control.d/{{ item }}"
    loop: "{{ groups['pcp-hosts'] }}"
    notify: restart pcp

  - name: Create collector host directories by looping over pcp-hosts group
    ansible.builtin.file:
      path: "{{ collection_directory }}{{ item }}"
      state: directory
      mode: '0777'
    loop: "{{ groups['pcp-hosts'] }}"

  - name: Start and enable pcp services
    ansible.builtin.service:
      name: "{{ item }}"
      state: started
      enabled: true
    loop: "{{ enable_services }}"

  handlers:
  - name: restart pcp
    ansible.builtin.service:
      name: "{{ item }}"
      state: restarted
    loop: "{{ enable_services }}"
Again, I’ll try and point out the less obvious or perhaps more interesting parts of the above playbook.
The variable collection_directory is where the collected PCP data from the collectors will be stored.
The config_via_host variable is one I put in especially for my lab environment. When the config files are created, they point to a host to collect. If this variable is set to true, then the host’s IP address will be used. If it’s set to false, then the inventory_hostname will be used(generally a Fully Qualified Domain Name(FQDN)).
In the previous playbook I used a template, and I’m using one here in the monitor host configuration also in the following task:
  - name: Create config file for each pcp-host
    ansible.builtin.template:
      src: pmlogger-monitor.j2
      dest: "/etc/pcp/pmlogger/control.d/{{ item }}"
    loop: "{{ groups['pcp-hosts'] }}"
    notify: restart pcp
Here I’m using the template module directory rather than the template lookup plugin. Let’s examine the reference pmlogger-monitor.j2 template:
{% if config_via_host %}
{{ hostvars[item].ansible_host }} n n PCP_LOG_DIR/pmlogger/{{ item }} -r -T24h10m -c config.{{ item }}
{% else %}
{{ item }} n n PCP_LOG_DIR/pmlogger/{{ item }} -r -T24h10m -c config.{{ item }}
{% endif %}
This one uses a conditional “if else” statement, rather than just a loop. This is where I check if the collector host should be referenced via the inventory_hostname or via the ansible_host.
Executing/Troubleshooting Automation
Configure/Install/Troubleshoot Collector
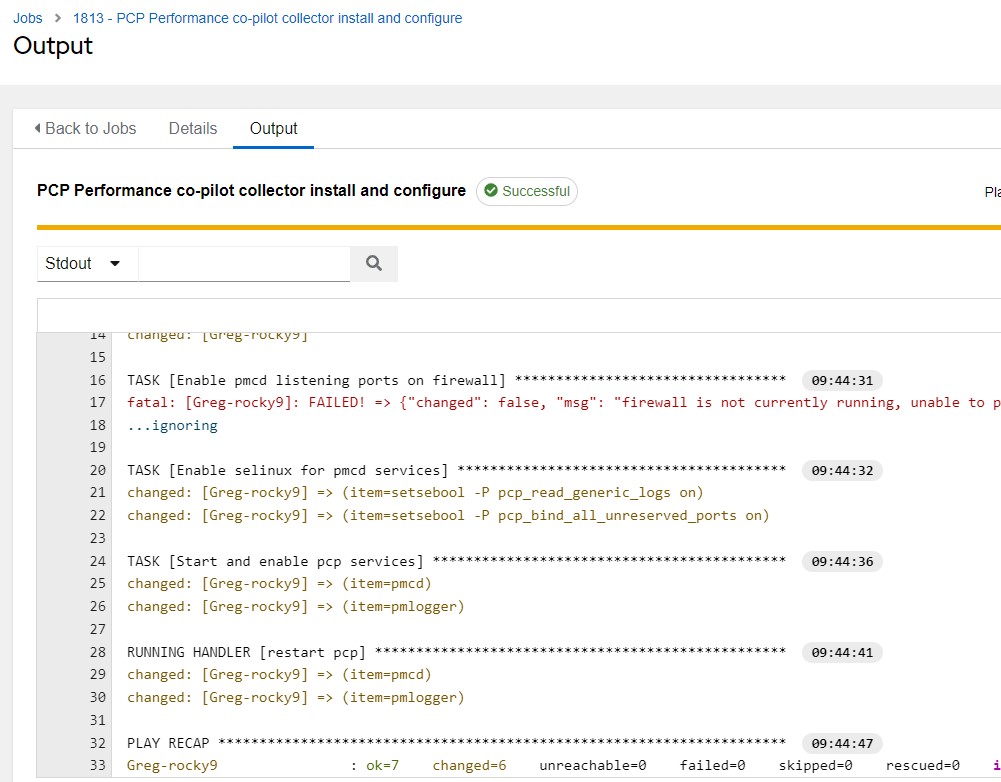
Once you’ve added your inventories, projects, credentials and job templates, you can execute the automaton for installing the collectors:
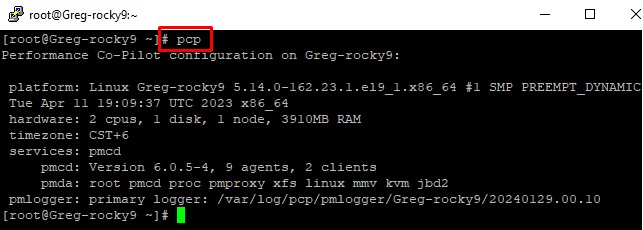
If you want to test the collector host, you can pretty easily do it by SSHing in and issuing the “pcp” command:
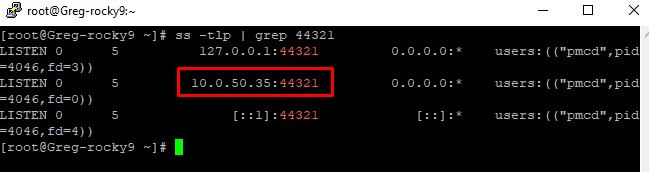
If the monitor is getting “connection refused”, be sure the check the listening ports on the collector with “ss -tlp | grep 44321”:
Configure/Install/Troubleshoot Monitor
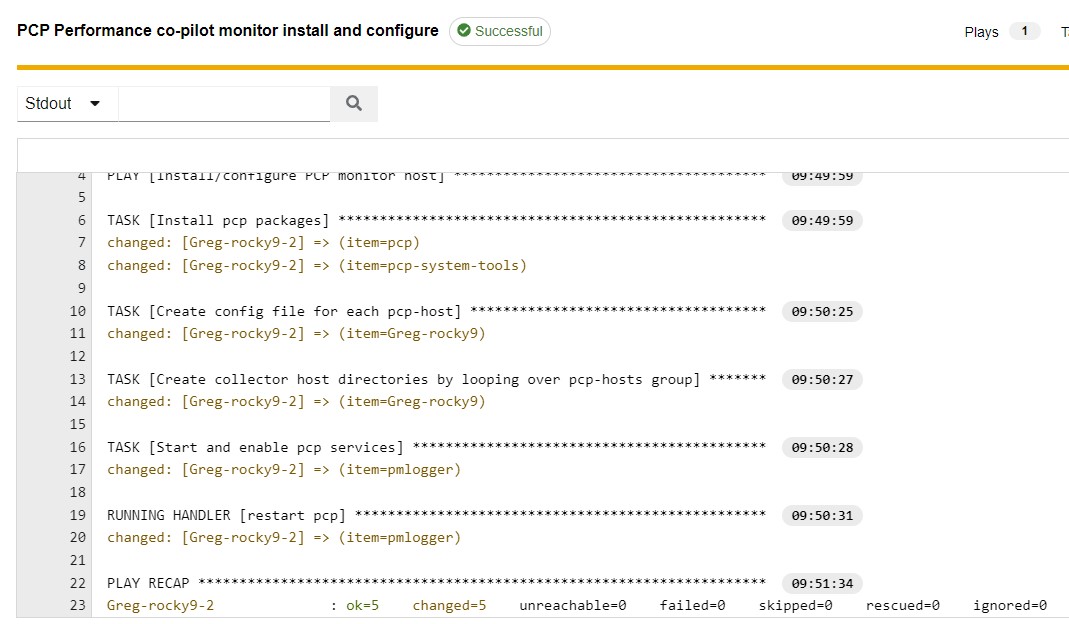
Once you run the monitor playbook you should see the successful message:
Now, if you want to test the monitor host, you can SSH into it and check the collection_directory. In my case I had it as “/var/log/pcp/pmlogger/”:
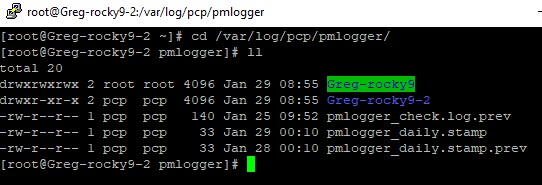
You can see here my PCP collector Greg-rocky9 folder is showing up, but is there data inside?:

This folder is full of data. If it wasn’t I would do a “tail pmlogger.log” in that folder to get an idea of what was happening:
![]()
Conclusion
While PCP data may not be for everyone, it can, quite easily, be configured. The trick about performance data is that if you have a performance issue, you can’t go back in time and enable the data collection, so why not go ahead and start collecting BEFORE there’s an issue 🙂.
As always, thanks for reading. If you have any questions or comments, I’d love to hear them. If you use PCP in your environment, I’d love to hear about that also! If we can help you on your automation journey, please reach out to me.
Good luck and happy PCP automating!
Leave a Reply