This is a quick demonstration on pulling AWS hosts into the Ansible Automation Platfrom(AAP) controller. The beautiful part of the process is just before I execute a piece of automation, controller will reach out to AWS and refresh the inventory so that I always have the freshest/tastiest hosts. I also demonstrate granular host filtering and automatic group creating/assigning of hosts to groups. While I do show filtering and group assignment based on tags I also explain what other options are available.
Video Demonstration
AAP Configuration
First create a credential for your EC2 instance:


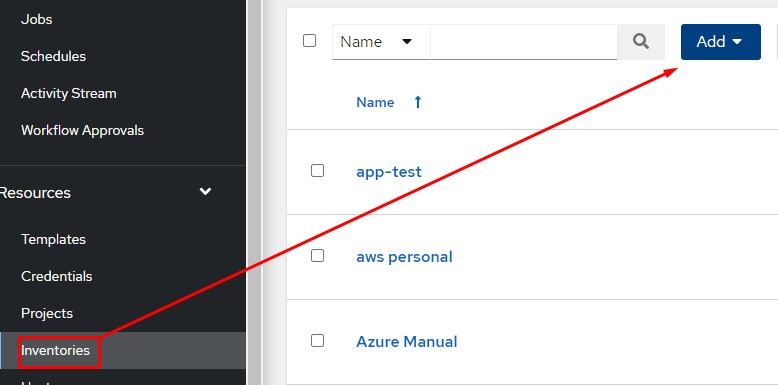
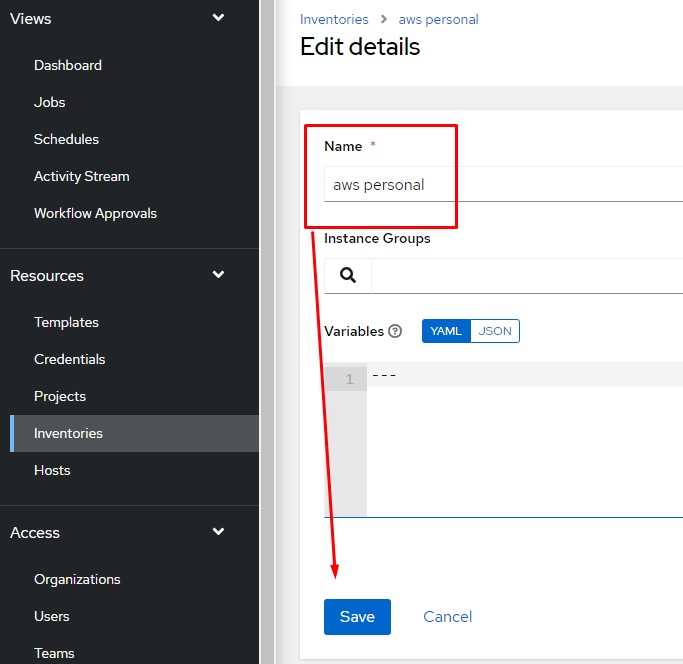
Next create a standard inventory:
After that I need to add an inventory source:
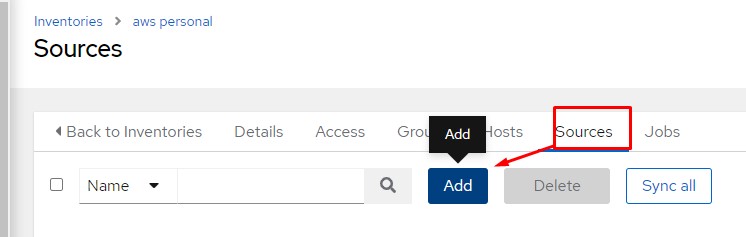

Notice that I choose source of Amazon EC2, then selected the credential I created in the first step. Technically at this point I’m done and can syncronize all hosts that the account has access to.
Additional options on inventory source:
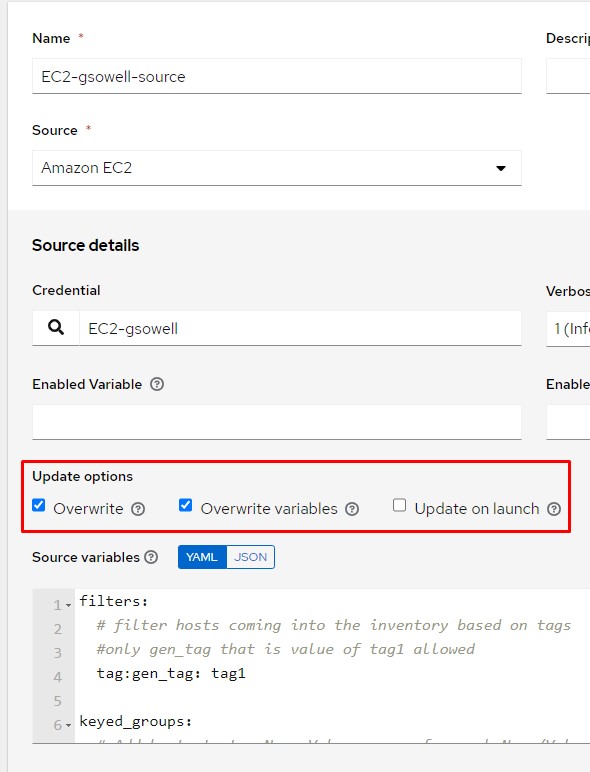
There are three options here, and I’d recommend checking all three of them.
Overwrite will make sure that the AAP inventory always matches the AWS inventory. When this option is set; if AAP has 10 hosts, and AWS only has 9 hosts, AAP will delete the one host that doesn’t match in its own inventory.
Overwirte variables will make sure that all variables and subsequently groups in the local inventory are kept in parity with what lives in AWS.
Update on launch will fire off this synchronization before any piece of automation runs that utilizes this inventory. That way the inventory will always be updated with the most recent revision of hosts.
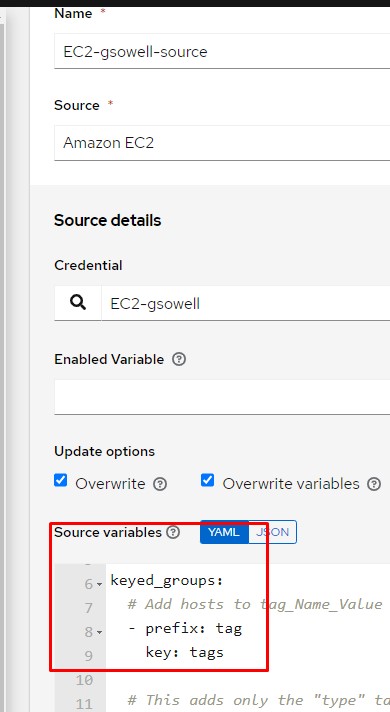
Automatically Creating Groups Inventory Source
Groups can be automatically created on synchronization via the source variables section using keyed_groups:
Documentation can be found here, but may be a little confusing.
When a host is imported, a whole slew of variables are brought along with it; here’s an example of one of my imported hosts:
ami_launch_index: 0
architecture: x86_64
block_device_mappings:
  - device_name: /dev/sda1
    ebs:
      attach_time: '2022-03-11T14:40:37+00:00'
      delete_on_termination: true
      status: attached
      volume_id: vol-0cc2c8c8193b42222
capacity_reservation_specification:
  capacity_reservation_preference: open
client_token: ''
cpu_options:
  core_count: 1
  threads_per_core: 1
ebs_optimized: false
ena_support: true
enclave_options:
  enabled: false
hibernation_options:
  configured: false
hypervisor: xen
image_id: ami-0b0af3577fe5e3222
instance_id: i-08ed2eb8bc27a6222
instance_type: t2.micro
key_name: aws-ec2-personal
launch_time: '2022-03-11T14:40:36+00:00'
metadata_options:
  http_endpoint: enabled
  http_put_response_hop_limit: 1
  http_tokens: optional
  state: applied
monitoring:
  state: disabled
network_interfaces:
  - attachment:
      attach_time: '2022-03-11T14:40:36+00:00'
      attachment_id: eni-attach-0a0554d977fdbd222
      delete_on_termination: true
      device_index: 0
      network_card_index: 0
      status: attached
    description: ''
    groups:
      - group_id: sg-09e32db0f4185b222
        group_name: launch-wizard-1
    interface_type: interface
    ipv6_addresses: []
    mac_address: '12:86:2e:9c:a1:4f'
    network_interface_id: eni-099f39193d3e62222
    owner_id: '726302647222'
    private_dns_name: ip-172-31-86-229.ec2.internal
    private_ip_address: 172.31.86.229
    private_ip_addresses:
      - primary: true
        private_dns_name: ip-172-31-86-229.ec2.internal
        private_ip_address: 172.31.86.229
    source_dest_check: true
    status: in-use
    subnet_id: subnet-04cbae8821c09d222
    vpc_id: vpc-0c18720055c098222
owner_id: '726302647222'
placement:
  availability_zone: us-east-1c
  group_name: ''
  region: us-east-1
  tenancy: default
private_dns_name: ip-172-31-86-229.ec2.internal
private_ip_address: 172.31.86.229
product_codes: []
public_dns_name: ''
requester_id: ''
reservation_id: r-0adfed50d497bd222
root_device_name: /dev/sda1
root_device_type: ebs
security_groups:
  - group_id: sg-09e32db0f4185b222
    group_name: launch-wizard-1
source_dest_check: true
state:
  code: 80
  name: stopped
state_reason:
  code: Client.UserInitiatedShutdown
  message: 'Client.UserInitiatedShutdown: User initiated shutdown'
state_transition_reason: 'User initiated (2022-03-11 15:43:37 GMT)'
subnet_id: subnet-04cbae8821c09d222
tags:
  gen_tag: tag1
  type: web
virtualization_type: hvm
vpc_id: vpc-0c18720055c098222
As you can see, it’s a LOT of information. Any of the variables you see here are fair game for creating groups! All you really have to do is specify the variable you want to use in the key_groups section. For the screenshot above I used tags. So any tags that my EC2 instances have, automatically get imported as groups:
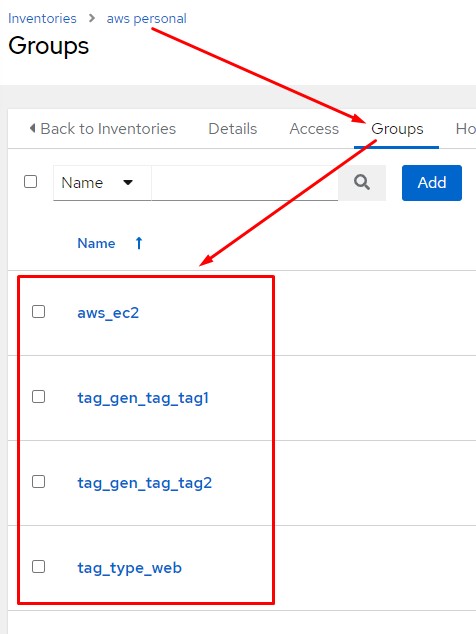
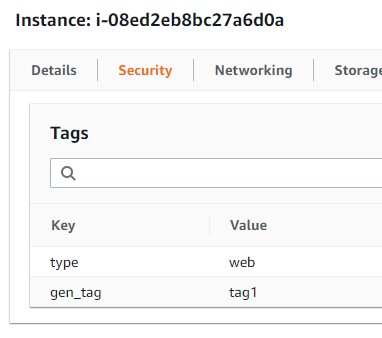
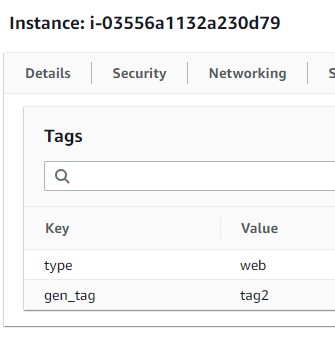
As you can see the top image is my ansible inventory and the groups that were auto created, and the bottom two are the tags shown on my individual instances in the AWS console.
As you can image a LOT of goups will be auto created. Say for example all I really wanted to auto create are the “type” tags…so things like: web, db, lb, whatever. I would create a key_groups filter like so:
keyed_groups:
  # This adds only the "type" tag as separate groups
  - prefix: tag_type
    key: tags.type
This would add only the tags of “type”. Notice how it’s in standard variable dot notation. As in variable.variable.variable. Looking at one of my inventory hosts variables section I can see where the tags.type comes from:

Filtering Hosts In Inventory Source
To filter hosts that are coming from my AWS account I’ll make updates to the same source variables section as before:
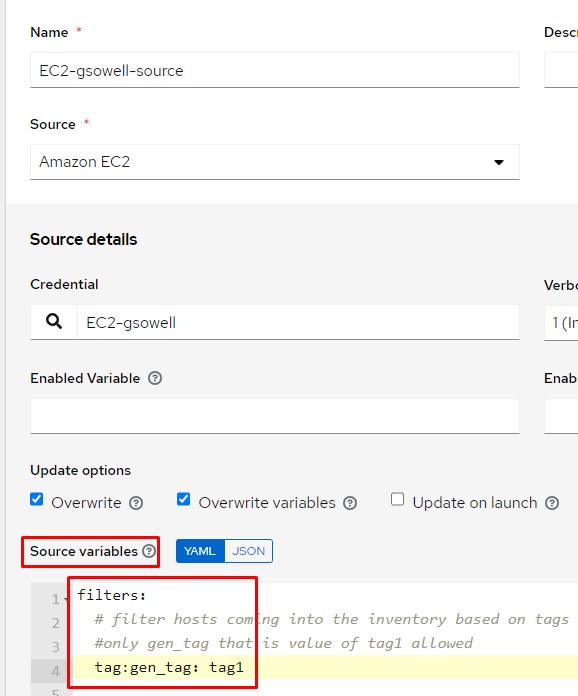
Here I add a filters section, then under it specify the criteria I want to filter based on under it. The full list of filter options can be found here.
You’ll notice in the screenshot above that I chose to filter on instance tags and in particular I’m searing the gen_tag for any hosts that have a tag of “tag1”. Keep in mind that the filter option still allows keyed_groups to be used to automatically create groups and associate hosts to them.
Conclusion
As you can see, it’s actually pretty easy to not only automatically create groups while importing AWS assets, you can also pretty easily filter the import of hosts based on all kinds of criteria! If you have any questions or comments, please fire them my way.
Good luck and happy importing!
Leave a Reply