

Using Ansible Automation Platform For Post Configuration With Red Hat Satellite Provisioning Via Callbacks
That title is a mouthful.
In essence, what I’m doing is:
– Connecting my Satellite install to Azure so I can deploy RHEL images
– Once I use Satellite to deploy the image and it is provisioned, the VM will contact my AAP server via a “Callback”
– The AAP(call it Tower or Control, whichever you prefer) will then sync its inventory from Satellite, and connect to the VM to perform whatever configuration you like
Demo Video
Products Used
Azure is the cloud provider I’ll be deploying my VMs into. I’m using the free tier to do all my lab work in. Key here is to kill or pause anything you deploy but don’t use.
Red Hat Satellite is primarily a life-cycle management system for RHEL environments…think of it as a kind of WSUS for RHEL.
The Ansible Automation Platform is kind of all I talk about these days :). It’s the automation platform that will be doing the post provision configurations.
Red Hat Enterprise Linux(RHEL). Enterprise ready, fully supported Linux OS.
Satellite Install/Configuration
I started with a standard RHEL7 server in my lab with it pretty much a flat configuration. The role and following playbook gets Satellite up and running(found in my repo here). The role is from here originally.
The install playbook can be found here:
I won’t cover everything in the playbook, but in short it setsup a fully qualified domain name and hosts entry on the satellite server, issues a yum update, then calls the satellite install role. The FQDN configuration is required for satellite, otherwise it barfs.
After the install script completes I should be able to browse over to it(I’ve also created a DNS entry for the host):
AAP Configuration
This section ultimately sets up a callback method to active a job template. What it does is allows any host to issue a curl command to AAP and it will then fire off a job template directed towards that host. You can find the blog post about it here that I used as reference. Note that the method for calling this via Satellite as shown in that post did not work out of the box for me, so I pivoted to something else, which I’ll outline later. So the section where they are setting up the custom parameters can be skipped.
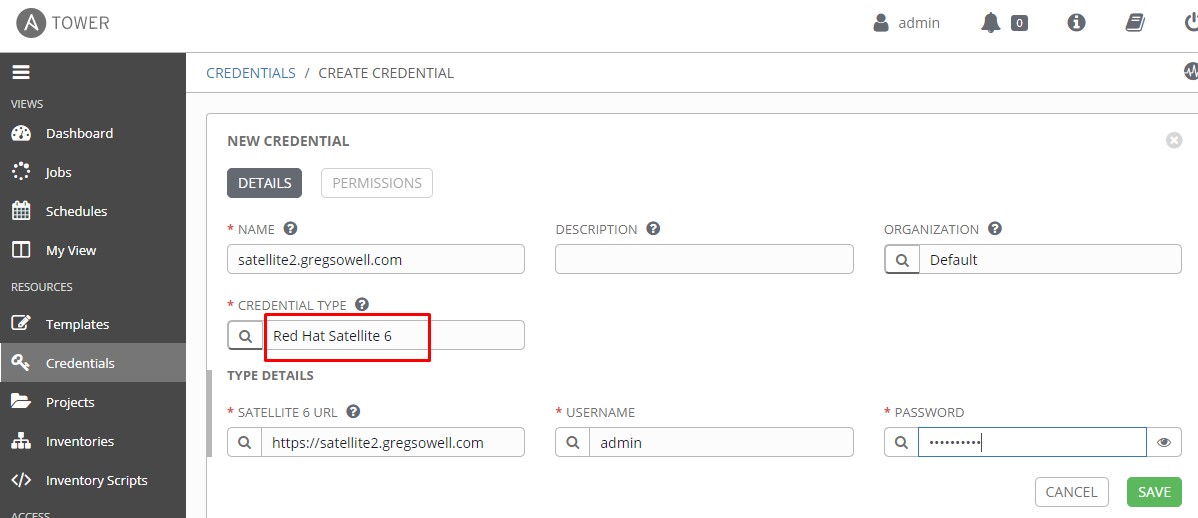
I need to setup credentials for AAP to connect to my satellite server so that it can pull all of the hosts into an inventory.
I’ll go to credentials and create a new entry entry with credential type of Red Hat Satellite 6:
I’ll now be able to use that to connect to a custom inventory source.
You’ll also need to now create a user account that matches what satellite will be setting up on the VMs when it provisions them. In my case it was user “ansible”, so I’ll create the cred too.
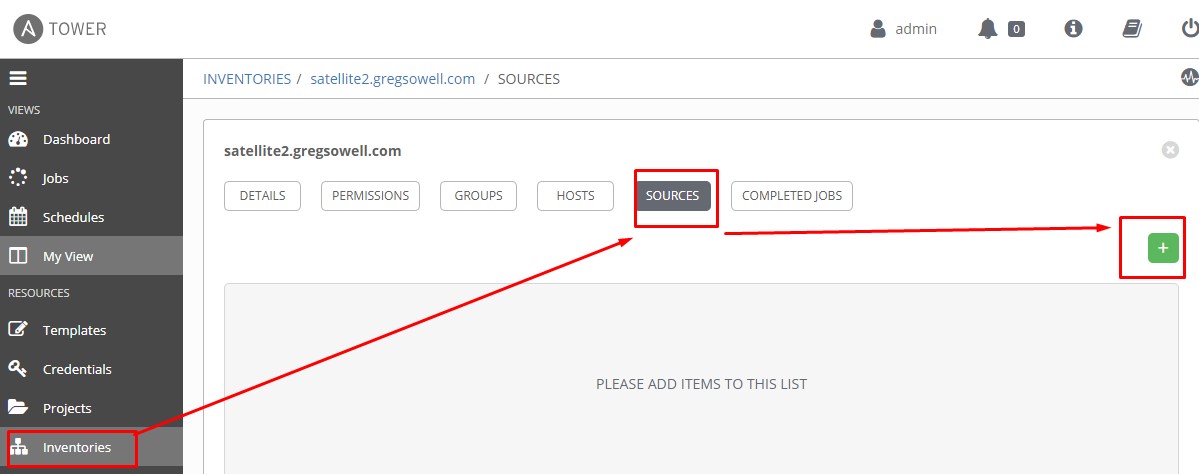
I’ll now create the inventory for my satellite server:

^^ This is one of the VERY important pieces here. In the inventory source I choose Red Hat Satellite 6 and it gives me some additional options. I can now choose the satellite credential I just created, thus it knows where to go to grab the info. I then enable all of the update options, this will cause the satellite server to be requeried each time this inventory is accessed. It will also clean out any old entries and only install active hosts from Satellite.
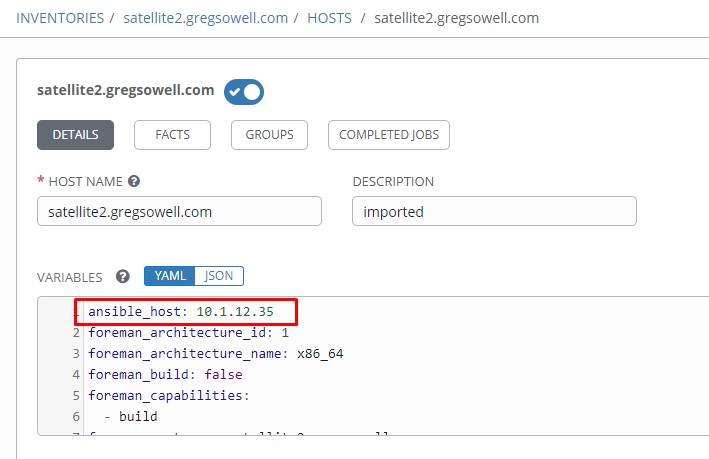
Now for an extremely important piece! Notice that I have something in the source variables section. The compose option will allow me to build any new variables I want from the information returned from the quireied source. In this case, everything returned has “foreman_” before the variable. The callback method being used here has a process by which it has to ensure the host calling has an entry in the inventory. If you are registering hosts in a DNS server as they are being provisioned, then all will work just fine as the inventory saves the FQDN in to connect to hosts. If, however, like me you aren’t doing auto DNS updates it will fail at this step. If I have the ansible_host variable present it will work just fine, sooooo that’s why I have the compose command create the ansible_host entry, it makes this all work sans DNS auto updates.
Source Variable settings:
---

compose:

  ansible_host: foreman_ip
I should be able to sync the inventory and check one of the hosts to see that it created the ansible_host variable:


I’ll now add a job template in my AAP based on this playbook(obviously you will want to pull it in with the rest of the files via an inventory).
I’ll take a look at this playbook first, then look at the job template.
The playbook starts by making sure there isn’t already a host key saved in the system for this IP. For some reason when using the callback method it will add a key to the key file, so when you are labbing things it will cause you issues. This is why the first task clears out any entries for the host IP in question.
Next I setup the FQDN, then download and install the katello RPMs from the satellite server(you will need to update the satellite URL here).
After that I do a quick hack that fixes a wacky DNS issue. When you create an Azure resource group I know it assigns it a random cloudapp.net domain to reference those objects fully qualified. My entries in Satellite, however, are using my gregsowell.com domain, so when I issue the subscription-manager register command on the VM it creates a duplicate entry sourced from the hostname + the crazy cloudapp.net domain. So the hack around this is to create a katello.facts file and populate the network.fqdn entry with my inventory_hostname.
Now I register the host to the Satellite server using the subscription-manager register --force --org="NASA_JPL" --activationkey="library-activation" command. You’ll notice that there’s a second commented out entry, and I left this so that I would add in here how I attempted to use the “–name” option. I figured this would adjust the FQDN, but it does not LOL, so don’t waste your time with it.
I next pull down my satellite tools and install the katello packages.
This is technically the end of the playbook here, but it doesn’t have to be. This is the point where I could do further checking…say for example I can check which host group it’s a member of and call another playbook based on it for say a www group or perhaps a db group.
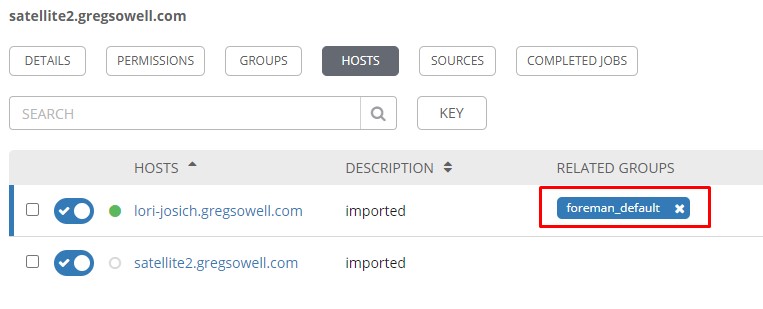
For example, I added this host using a Satellite host group named “default”, so it shows up in my inventory as being a member of the “foreman_default” group, which I could match on:
For that matter I could check the server name and see if it contains www or db and then process further. Keep in mind that this is just the kicking off point.
Now that I’ve looked at the playbook, I’ll examine the job template used:
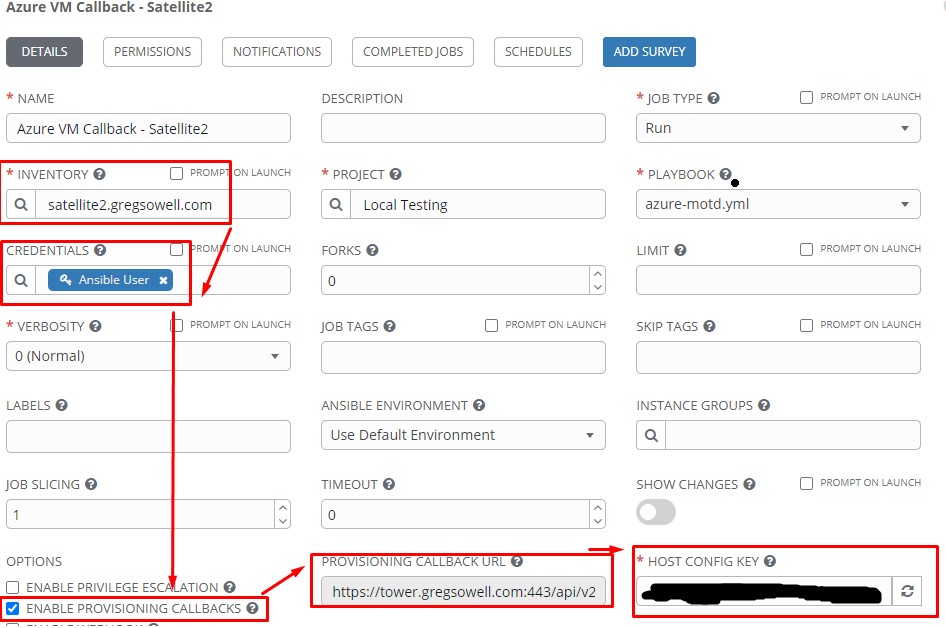
The important bits here are the satellite2 inventory that I created above, I’m using the same credential set that I configured in Satellite, and I enable provisioning callbacks. Once PCs are enabled it will give you the provisioning callback URL as well as the host config key to utilize. The provisioning callback and host key are used in the compute resource Custom Script section below.
Azure Configuration
To provision VMs one needs to create several things. One is a resource group under your subscription. A RG holds all of your assets(networks, interfaces, VMs, etc.). One can manually create all of this or you can use AAP again to build it all for me. My playbook for prepping the environment is here.
The script first creates a storage account to keep all of your items in.
It then creates a virtual network and a subnet inside of that network.
Next it creates a security group and allows SSH in. Your mileage may vary on this, I’m just in a lab and there won’t be any public IPs on my resources so plan accordingly.
After that I create a virtual NIC so that I have something I can do test pings to. This is completely optional as I only have it in place for testing, but it’s not a bad idea.
The last section is prep work for my LAN to LAN VPN connection, which again, is optional depending on what you are doing in your environment. I currently have my AAP and satellite servers installed in my lab, so to reach the private addressing back and forth I have a VPN tunnel setup.
I ran into a lot of random issues like I hit a microsoft.compute resource missing error. What you need to do is enable it in Azure so that you can create virtual machines. What you want to do is go into your subscription > resource providers > search for microsoft.compute and add it:

Azure Resource Manager To Satellite Configuration
The official Red Hat guide I followed is here.
You first need to create an application that can be used by Satellite to login and manipulate resources on Azure. Follow the link here to get the info for the next section.
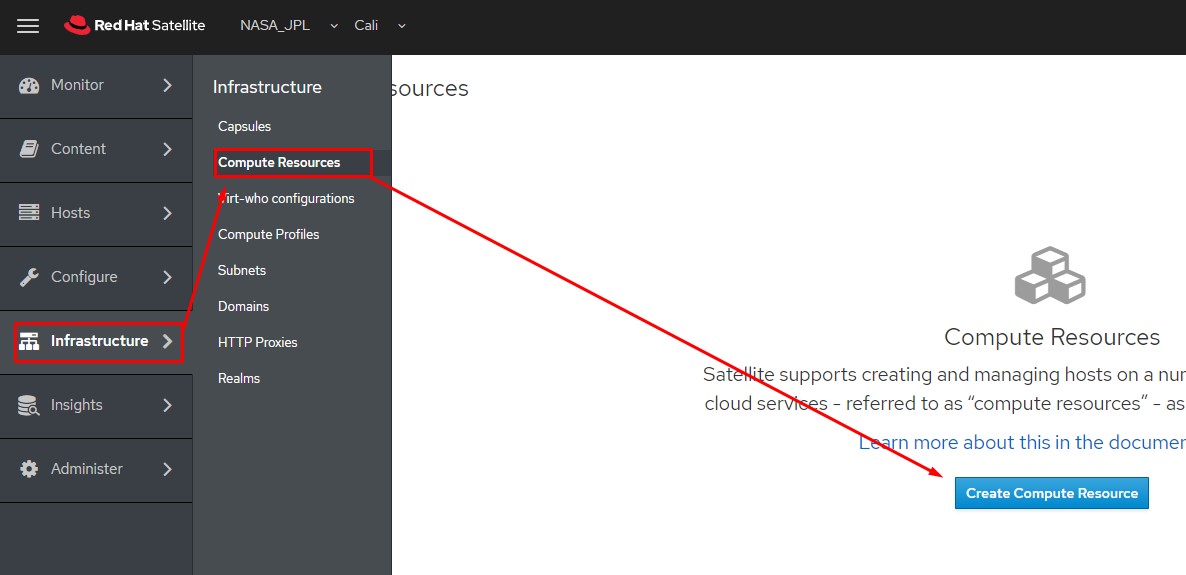
Infrastructure > Compute Resources > create Compute Resource
All of the info here is derived from adding your application above as well as the subscription section itself.
Once you fill in the blanks you want to load in the different regions:


Then once you choose a region, any resource provisioned from this Azure resource will forever be in this region. Something to keep in mind is that not all resources are available in all regions. For example I live in Texas, so I was originally using the South Central region. I kept having failures trying to deploy standard RHEL7 images…and it turns out they aren’t available in this region. Soooo, my solution(since it is just a lab) was to deploy to the EastUS region that happily deploys the image. Once you create this compute resource in a region, you can’t go back and edit it. You can add an additional resource and just put it in a different region if you want, but these aren’t modifiable.
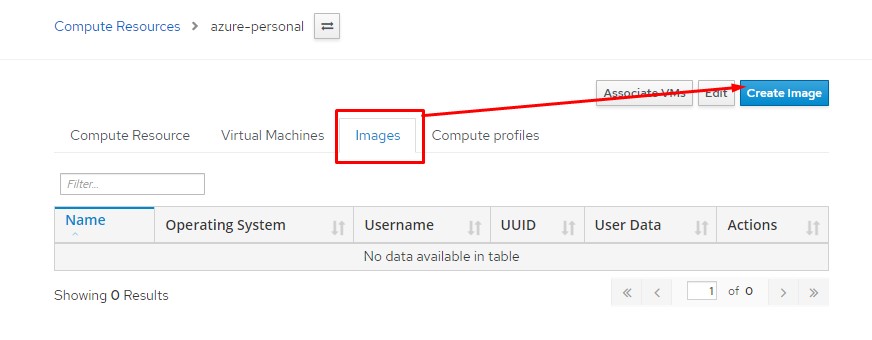
I’ll now want to add some images for this resource to be able to deploy.
from inside the compute resource click on images and create image:
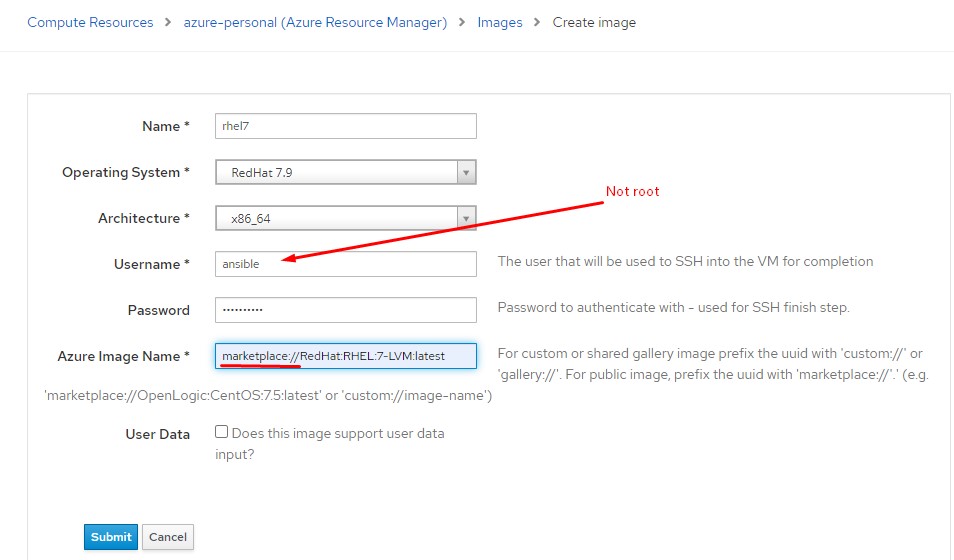
I’ll now fill out the details for the image. Here I’m just going with the latest LVM RHEL7 image. Notice that you have to preface the name of the image with “marketplace://”. Also note that you can’t login directly as root, so create a username that works for you, since I’m using Ansible for all of the things I’m making the user Ansible.
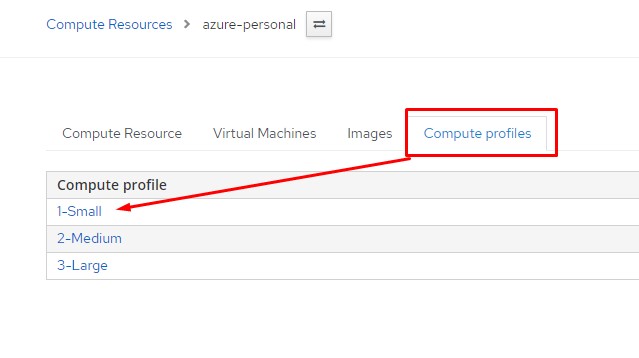
Next, click on Compute Profile from inside of the Azure resource manager details. By default it has three t-shirt sizes: small, medium, and large. I’m going to click on small and do some additional configuration just for that(just for labbing I’m keeping it simple).
The first options are setting up some of the VM options:
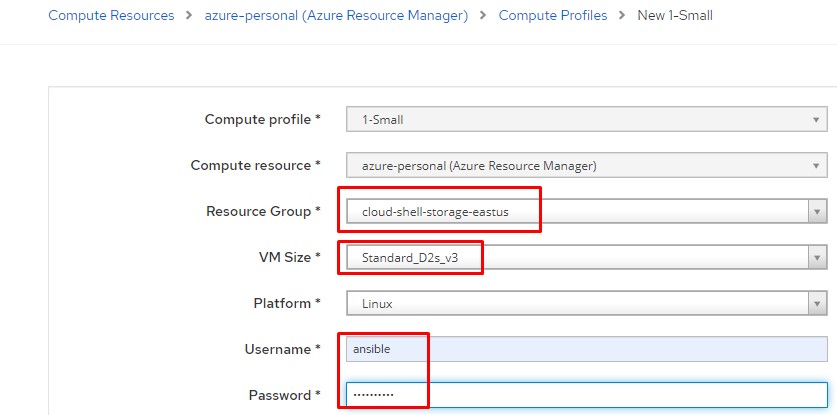
The compute resource was created by my earlier Azure provisioning playbook(see above).
These images have a recommended disk size of Standard_D2s_v3, but by all means customize it as you see fit.
Username/password is my ansible creds I’ll use to connect in; this is also your opportunity to enter in an SSH key to be installed. I’m just going to be using username/pass.
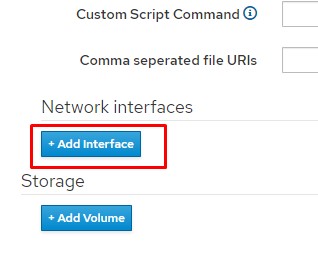
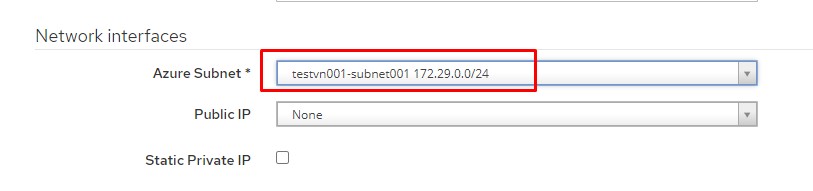
I’ll now add a network interface(again from the previously provisioned playbook above):
I now have my Azure configured subnet available:
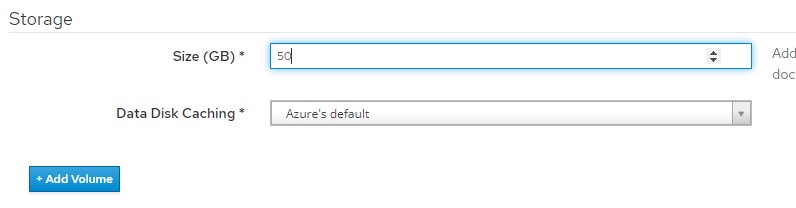
I’ll now add a storage device and give it about 50GB.
I’m going to scroll back up and add a custom script. I’ll show it first, then explain what it’s doing as this is VERY important:
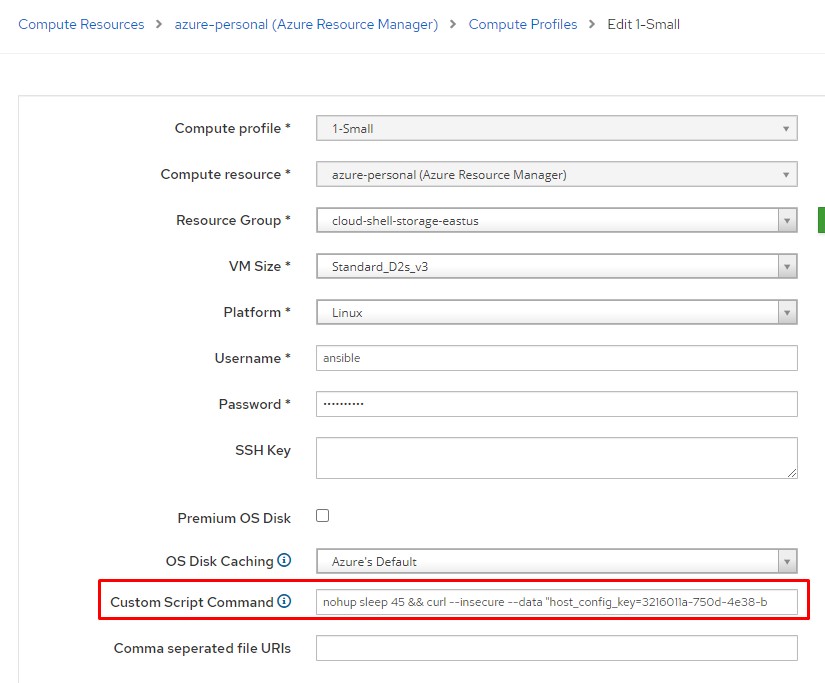
Custom Script:nohup sleep 45 && curl --insecure --data "host_config_key=3216011a-750d-4e38-b387-f0d533ee" https://towerprivate.gregsowell.com:443/api/v2/job_templates/110/callback/ &
So first I used nohub. This will throw a command into the background, so that even if a terminal is disconnected it will still complete. This is important as Satellite will connect to the VM, throw the command, and leave.
Next it will sleep for 45 seconds. This is in place so that Satellite will have enough time to put the VM into it’s database, so that when AAP is called this host will show up in the inventory file.
After that I use the standard curl callback command that instructs my tower server to kickoff my specific callback job template.
Last I have a lone “&”, which will kick all of this command into the background.
This custom script command is what kicks off all of the magic.
Satellite Prereqs
Most likely you have all of this in place, I’m just putting this here as a reminder to myself since I built this from scratch.
I’m first going to add my subscription. Well, I suppose first you want to generate the manifest file and download it(follow this link for that).I’ve connected to access.redhat.com and downloaded my manifest, then imported the zip file into Satellite:
![]()
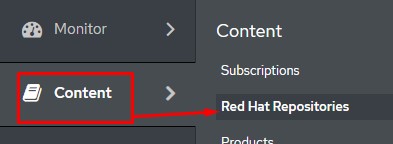
I’ll then add my repos:
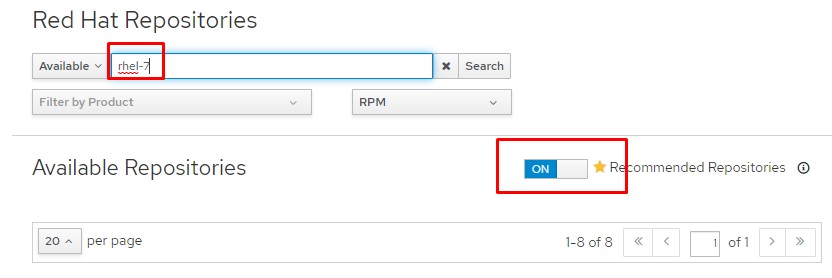
Next I’ll search for “rhel-7” and hit the button for only available repos:
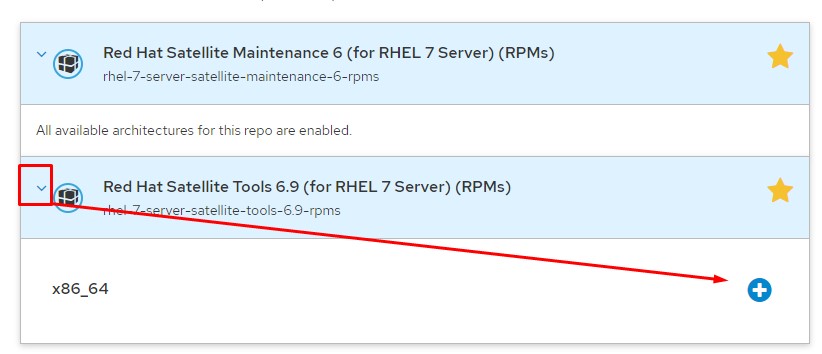
Next I’ll expand, then hit the + on any repos I want. In this case I want satellite tools for sure as I’m going to be pushing those in my demo:
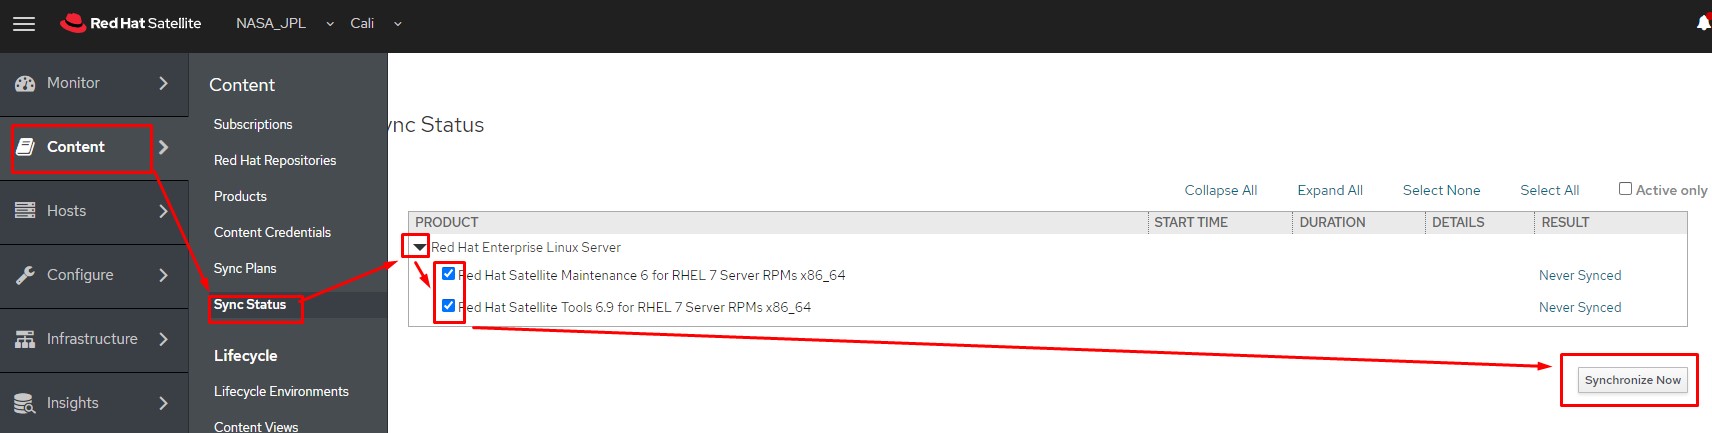
Now I synchronize my repos:
You’ll likely want to create a sync plan that will update your repos on a regular schedule.
I’m now creating an activation key: content > activation key:
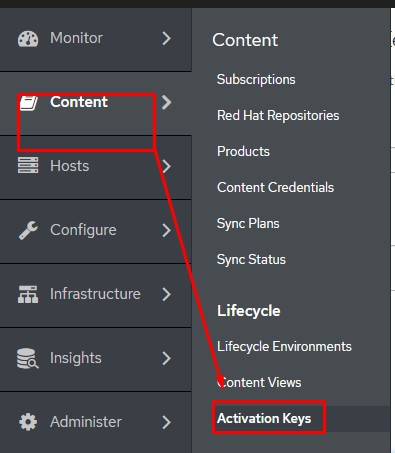
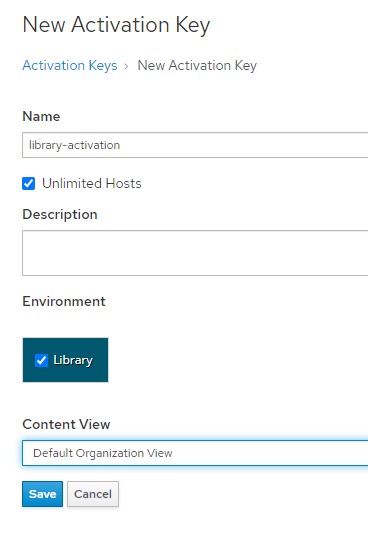
You can see that I was lazy and didn’t create a new life-cycle, instead I just used the library, which is the catch all.
I’ll now hit the repos section and enable all of my repos:
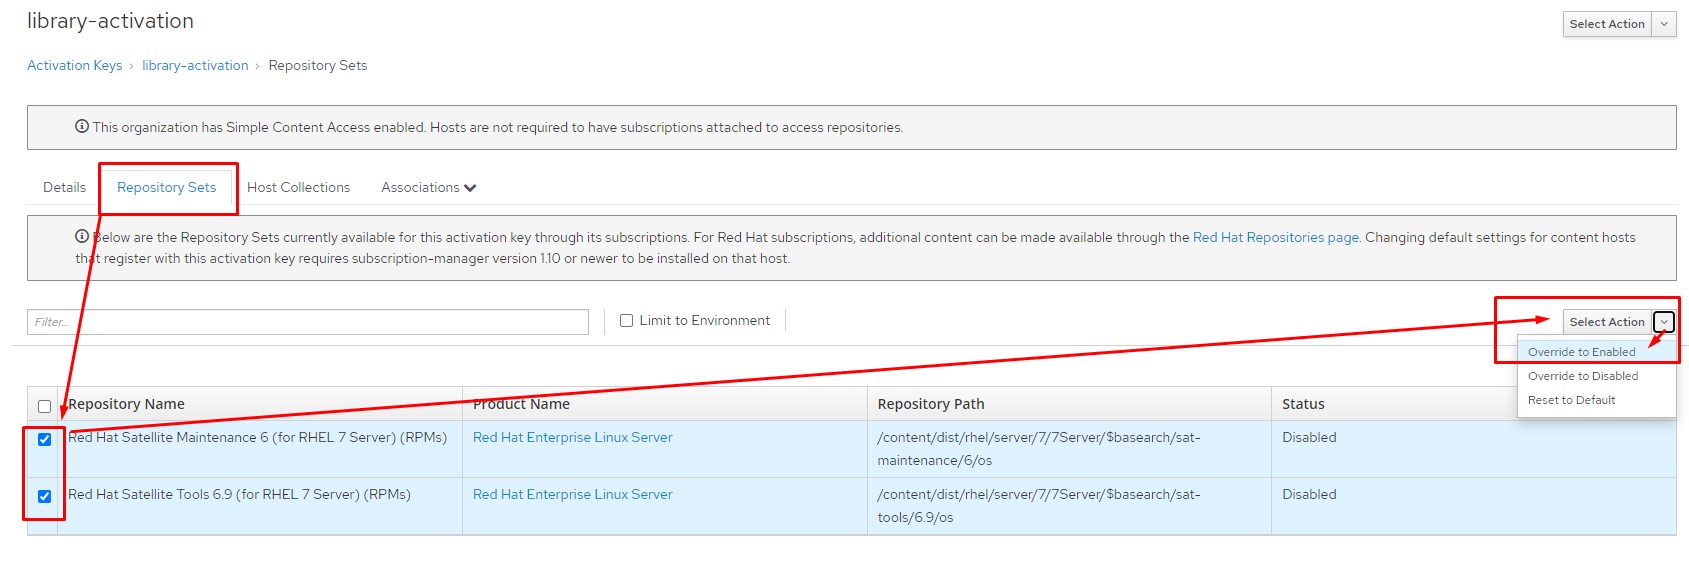
Notice the activation key from the details menu, make note of it as I’ll be using it later in the process. It’s what the VMs phone back home with to register to the Satellite server:

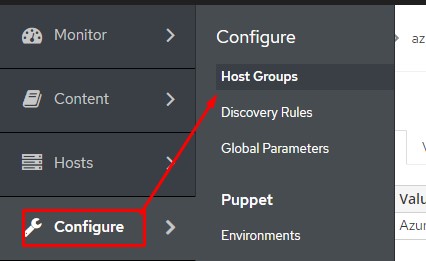
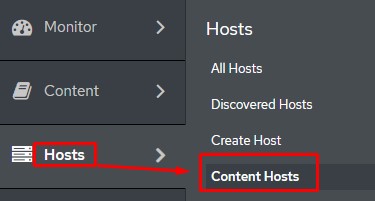
Create Satellite Host Group
Configure > host group
Now I create a new host group:

You will undoubtedly know more about all of the various lifecycles and content views you want to configure. The deploy on and compute profile are the sections of particular interest. I choose the azure resource and small compute profile just configured. It can also save a lot of time if you fill out all other sections that are of interest to you.
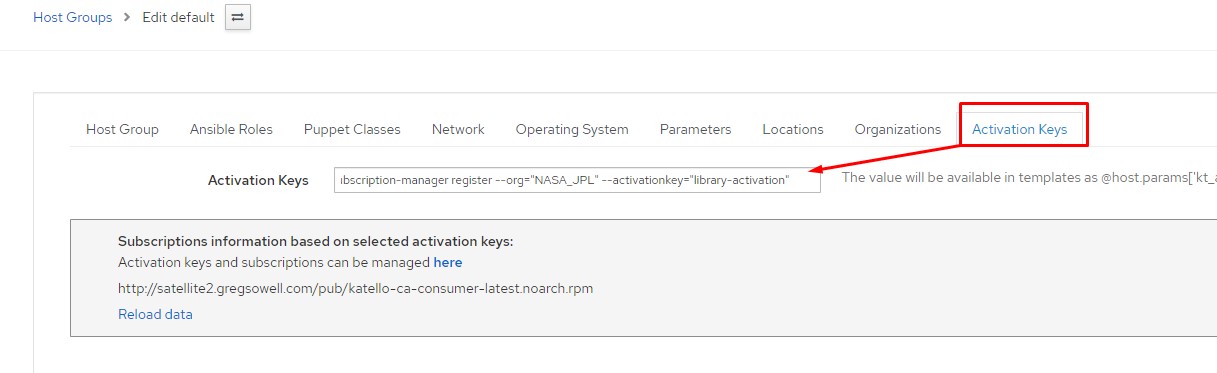
In this host group I’ll click on activation key and add the key I saved from the satellite prereq section:
Deploy VMs
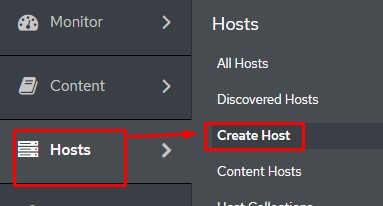
In Satellite I go to hosts > create hosts:
I now choose the host group that I’ve created, and it will populate virtually everything I need:

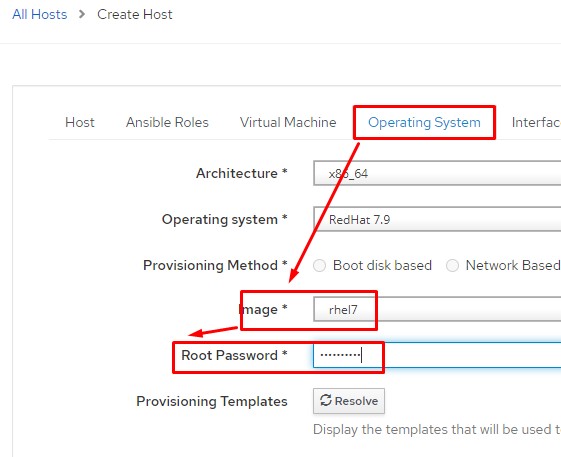
I’ll now pop over to the operating system section and choose my rhel7 image and setup the root password:
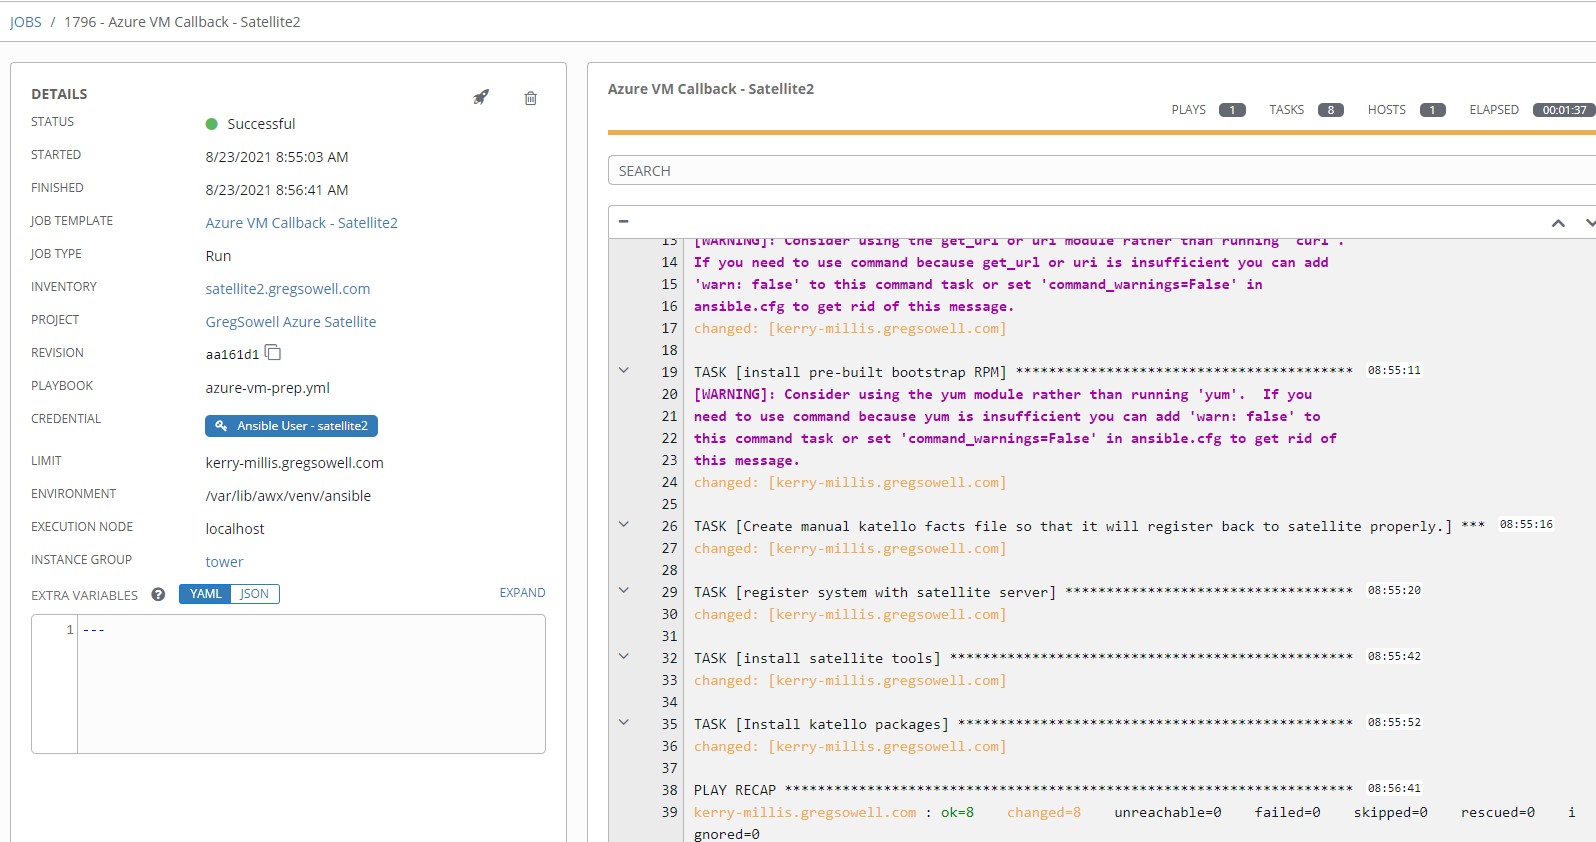
Once I click submit it will take a minute or two, but I should see an AAP job kick off, first to update the inventory, then the job template will fire and complete.
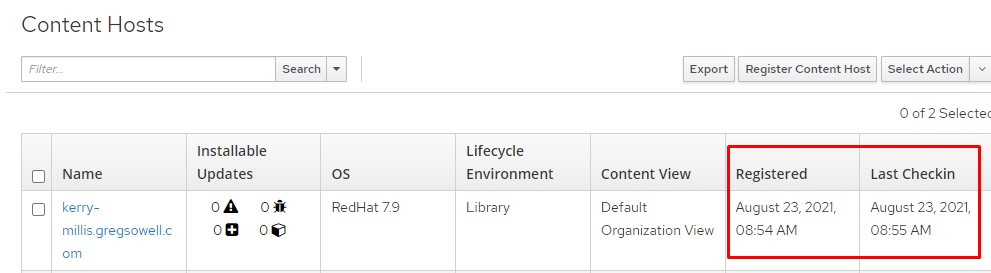
If I go to hosts > content hosts, I can see that the newly provisioned VM is in the list, and it shows up as registered, which means the AAP job template completed and had the VM phone home to the Satellite server!
Conclusion
I know this has a lot of moving pieces, but if you already have your Satellite setup and you have your Azure environment up and working, then this is a really quick project. Most of the above is me building everything from scratch, which the vast majority of you won’t have to do LOL.
As with anything, there are likely faster and more efficient ways of doing these things, and if that’s the case, please let me know what you come up with/how you would do it. Questions/comments always welcome.
Thanks, and happy Satelliting!