Pulling in hosts from SNOW really isn’t too bad, and in fact, there’s an Ansible blog post on it here. I’m not reinventing the wheel here, but I figure it’s always nice to have another perspective on the process.
Demo Video
SNOW CMDBs
First things first, where can I find the SNOW CMBDs? I use a developer instance, so there is already some material to work with, so your install may look different.
Here’s an article that shows how to quickly add entries to your CMDB, but also where to access everything.
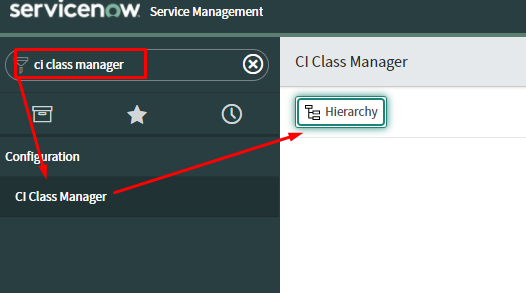
In SNOW type in “ci class manager” in the search field. Once there, click on the “Hierarchy” button.
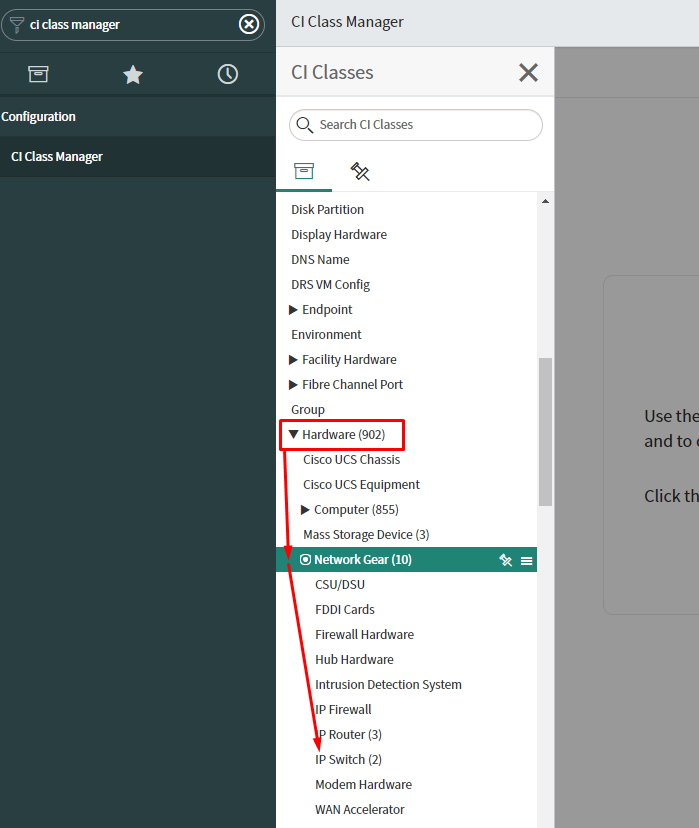
In here I browsed under hardware, network gear, and finally into ip switch.
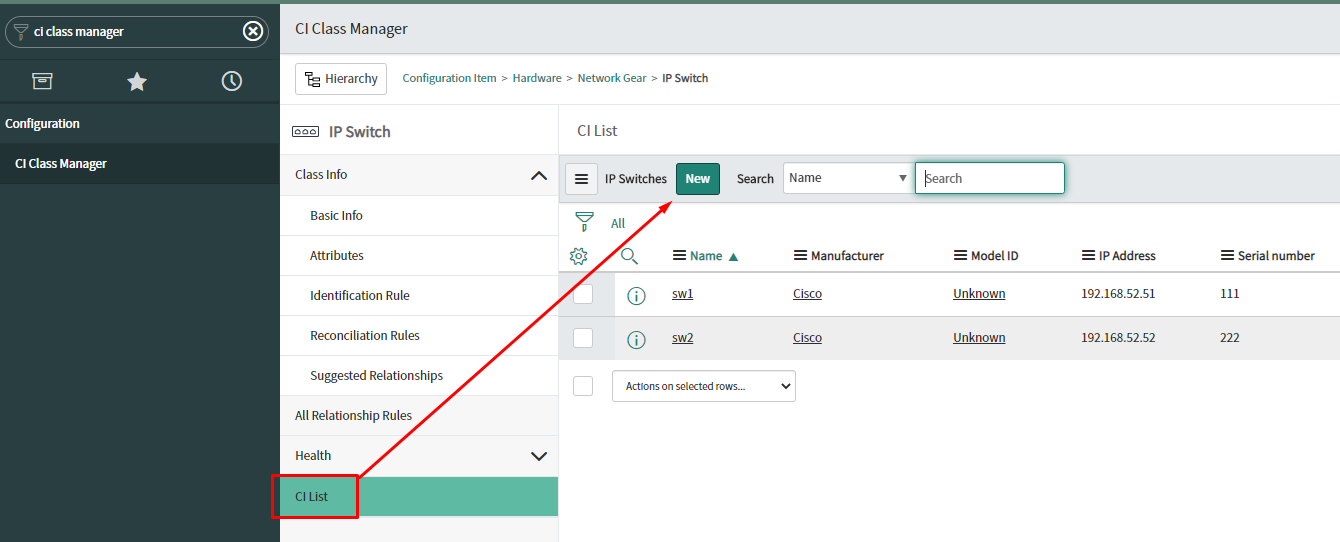
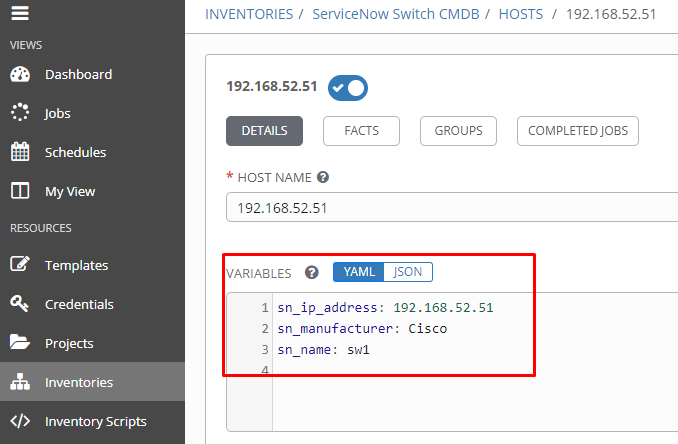
Once there to view all of the devices(or to add/edit them), click “ci list”. These entries were added by me; I put the manufacturer and IP addresses specifically. In the Tower section I use the manufacturer entry to assign the devices to a group as they are imported.
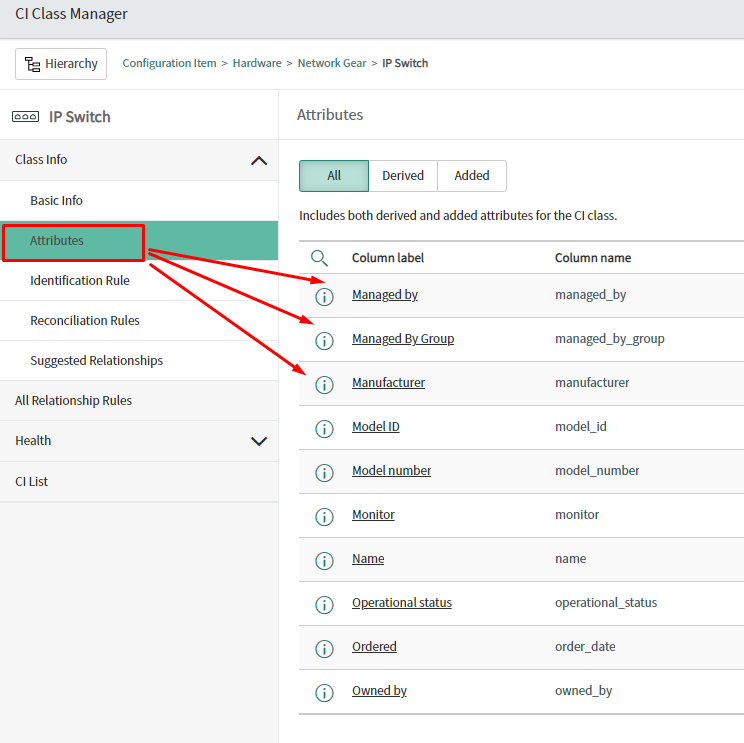
If I’m curious about what columns are available in the table, I’ll browse the attribute section under class info.
Playbooks
First I’m using a collection in the dynamic inventory script. This is a new method Ansible is using to package files together. I can manually install the collection ahead of time, or I can specify it in a requirements file and it will be pulled at run-time. The requirements.yml file is saved in a folder named collections. Here’s the contents of my requirements file:
Now that I’ve got that out of the way, I’ll take a look at the dynamic inventory file. In this case I’ve named it snow-switch-now.yml. Keep in mind that there is some arbitrary requirement that this file end with “now.yml”, so keep that in mind.
Having a look at this file, the plugin will always be the same(just how we are pulling everything).
The table will change based on which specific CMBD I want to pull. In this case I want all of the ip_switches. This name can be found above in the SNOW “ci class manager” section.
The fields section are the info that will be returned. Ultimately these will be added as hostvars for the inventory objects.
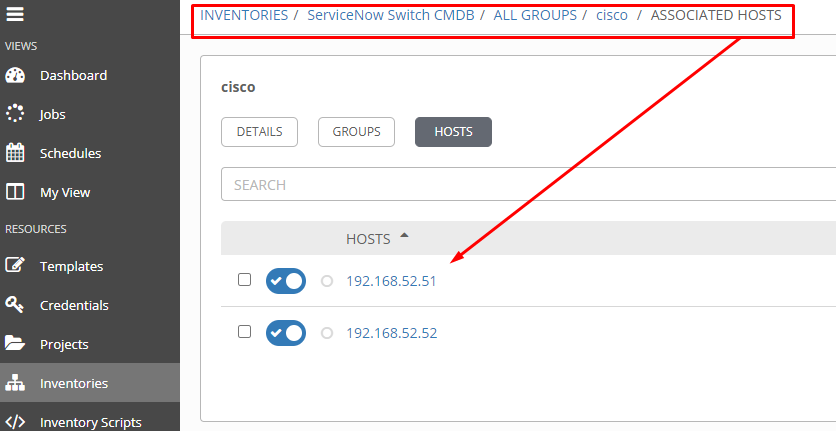
They keyed_groups section will add the hosts to groups based on returned CMDB information. In this case I’m going based on manufacturer, so all of my Cisco kit will end up in the cisco group.
Tower
First I need to setup a credential, and I created a custom credential to pass in my SNOW instance, username, and password via environment variables:
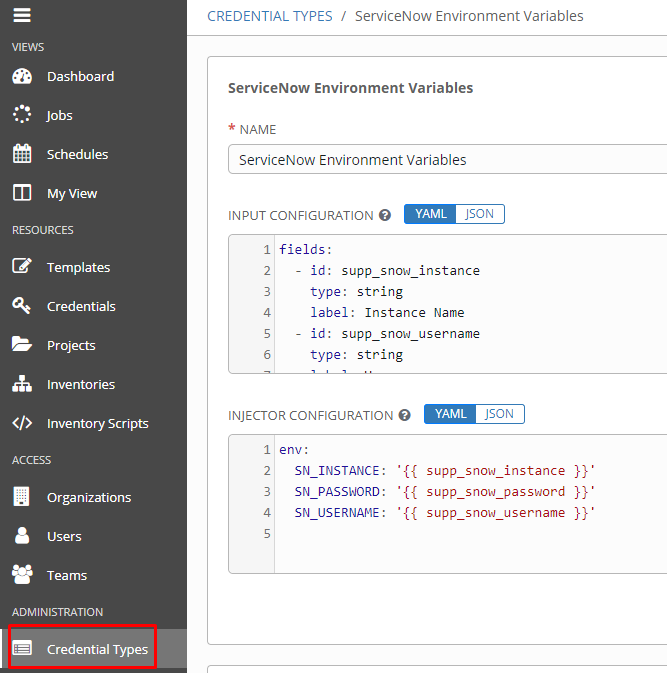
fields:
  - id: supp_snow_instance
    type: string
    label: Instance Name
  - id: supp_snow_username
    type: string
    label: Username
  - id: supp_snow_password
    type: string
    label: Password
    secret: true
required:
  - supp_snow_instance
  - supp_snow_username
  - supp_snow_password
env:
SN_INSTANCE: '{{ supp_snow_instance }}'
SN_PASSWORD: '{{ supp_snow_password }}'
SN_USERNAME: '{{ supp_snow_username }}'Once that’s created and I added in my custom credential, I then create the inventory.
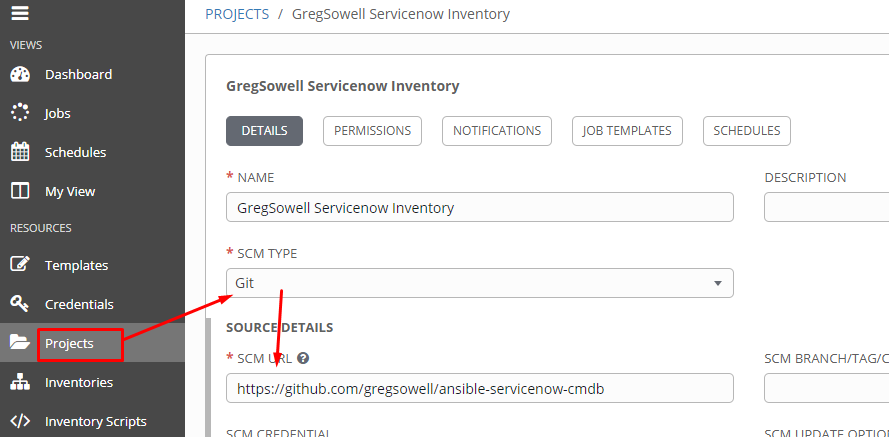
I’ll go ahead and add the repo I just created as a project; this will pull in all of my custom inventory yaml files.

Where it diverges is that I click the sources section and add a custom source.
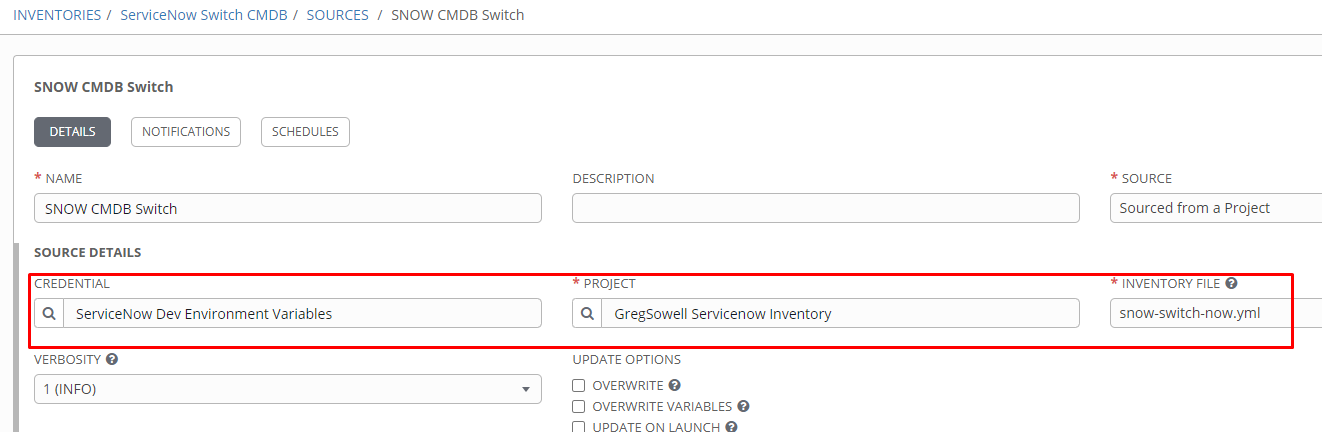
Once in the custom source I choose sourced from project, use my SNOW credentials I just created, choose the project holding my custom import script, and choose the yaml file.
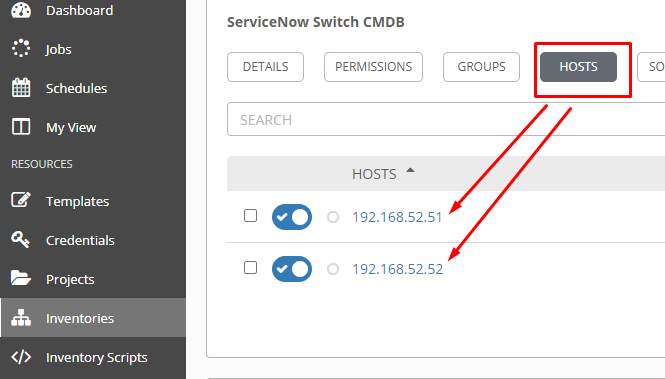
Now when I syncronize the inventory it pulls in my CMDB objects from SNOW:
Conclusion
While none of this is too terribly difficult, the first one can take a few minutes to sort out. Most of my problems surrounded formatting on the import yaml file, so be sure all of your column names are correct. I like the flexibility and power of this; how it allows you to very granularly separate inventories based on tables.
Let me know how you can see using this, questions, and comments.
Thanks and happy automating!
Leave a Reply