

I previously took a look at the hAP Lite here. I finally got a chance to bandwidth test the device and was pleasantly surprised.
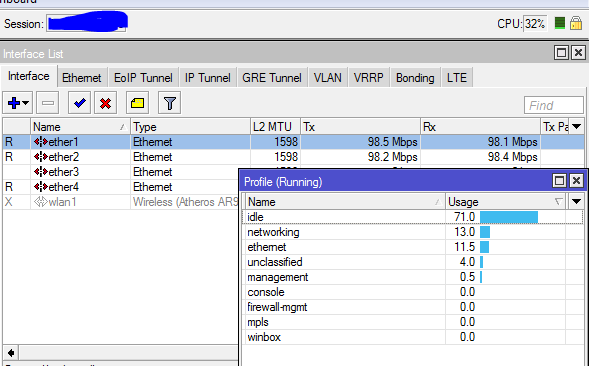
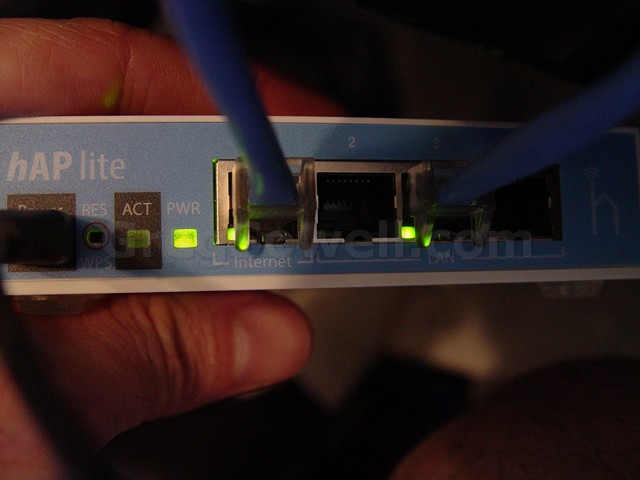
There is an x86 server on ether 1 and another server on ether 2. One btest session running 99 instances at full rate.
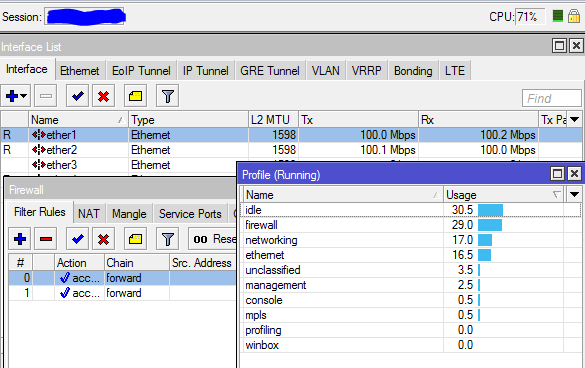
CPU 32%.
Throughput 99Mb.
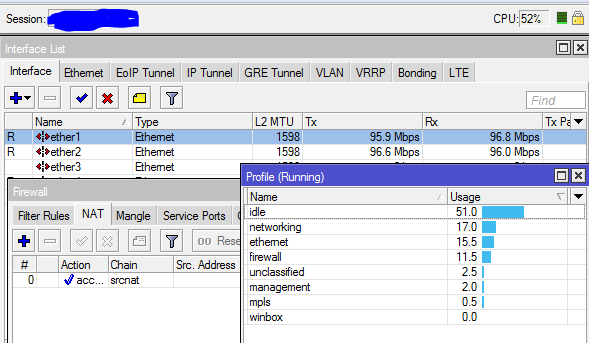
CPU 52%
Throughput 96-98Mb
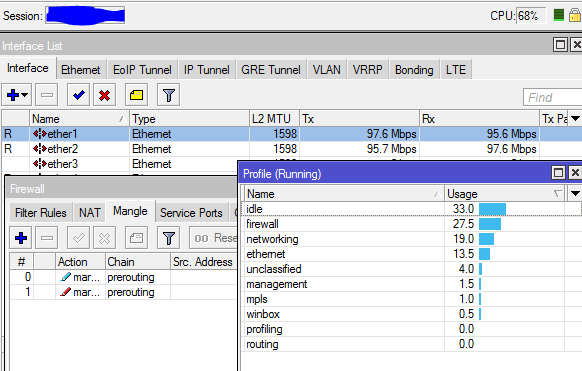
CPU 68%
Throughput 96-98Mb
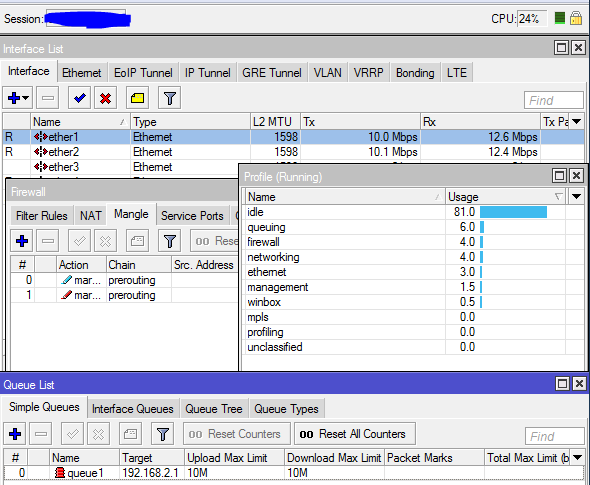
CPU 24%
CPU 71%
Throughput 96-98Mb
CPU 97%
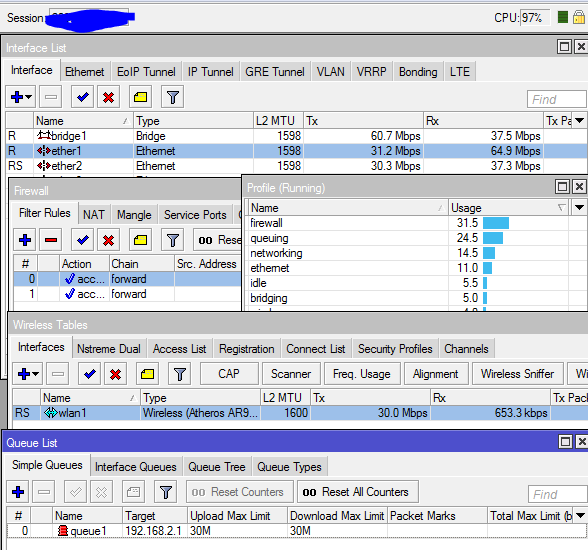
As you can see in the last image, we stretched it about as far as we could.
Since the btest isn’t a real world test, these are only sample values, but you can see that this little router still packs a punch. This guy should be able to do light QoS, firewalling, wifi, and move a good bit of traffic while doing it.
And for the $20 price-tag, I can see disabling the wireless and using them in quite a few locations to act just as routers or why not as MPLS/VPLS clients 😉
****Test results for the router here****
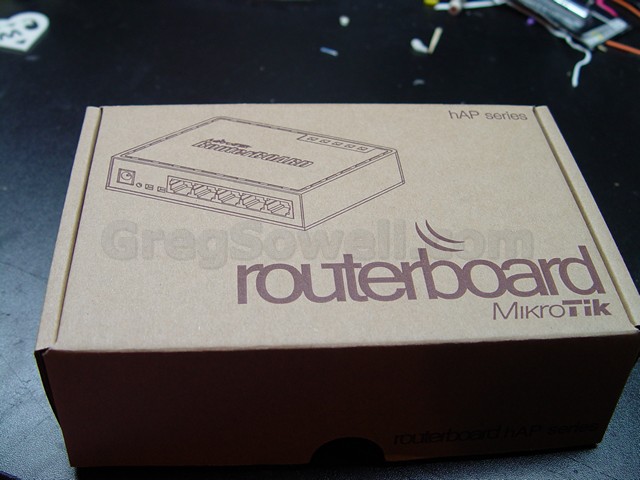
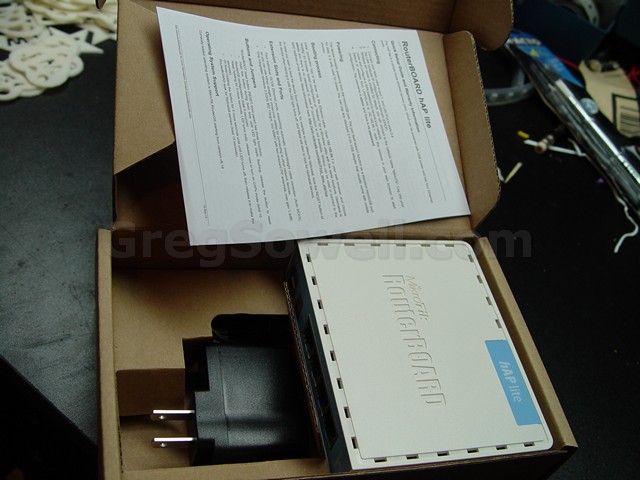
So I’ve gotten the first hAP Lite from ISP supplies and just pulled it out of the box.
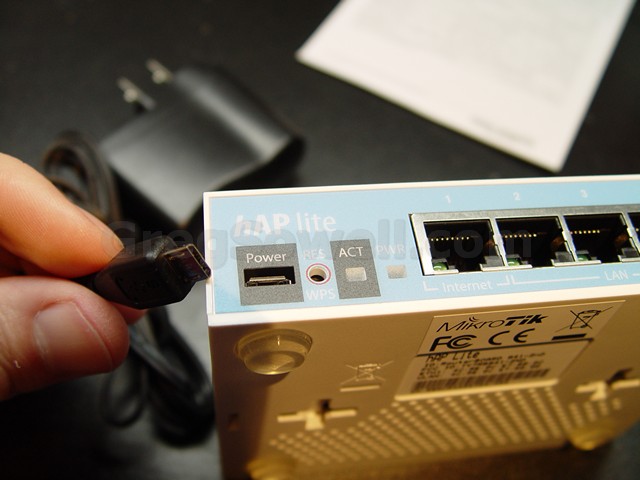
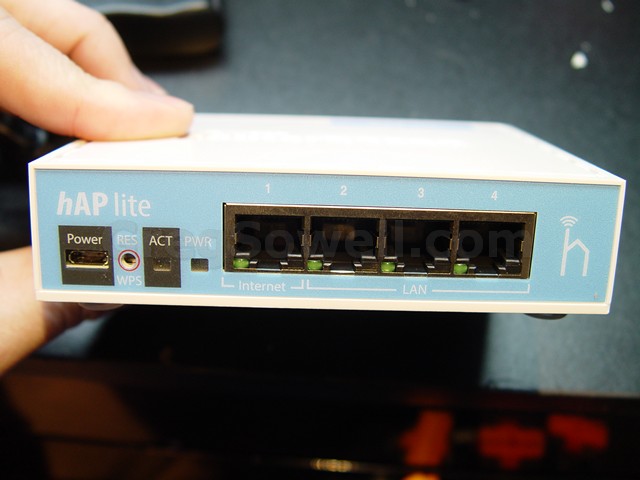
Left and Bottom you can see the antennas on the PCB.
LEDs are built into the ethernet ports now.
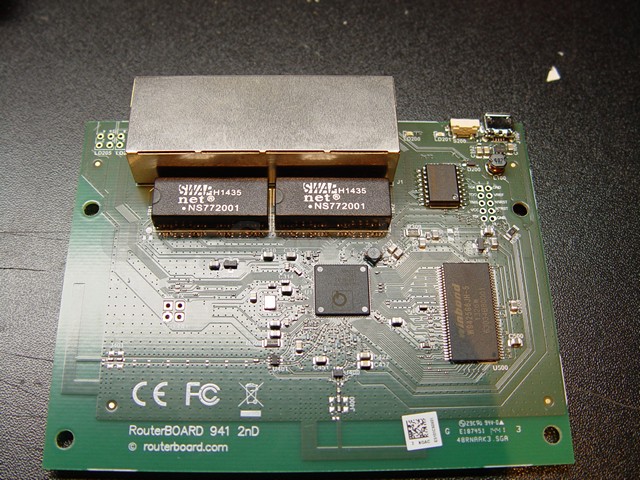
I’m guessing here, but to get to the price point they must be using new ethernet ASICs, hence one less ethernet port. I’m also assuming that dropping the circuits to take 8-30V in and just allowing 5V in saved some $ also. Unless I missed something it looks like they have a new CPU in place also.
These guys also seem to use their reset button as CAPs and WPS.
I’m going to push a little traffic through them doing some firewalling and light QoS just to see what they will do. I’m assuming I can do some 30Mbs of normal traffic…which will be Oh-so-nice-a.
What say you guys…would these made decent customer CPE routers?
Wow, the title makes this not sound like some rigged pile of parts hehe…Don’t get me wrong, this is totally pro.
I needed a way to power an access point so that I could test coverage patterns in different places. It is one thing to talk to a potential customer and say “I think if we place one here, and one here, we should get good coverage.” It is quite another to be able to just whip out an AP and fire it up, walk around completely at your leisure and test signal strengths.

Our victim
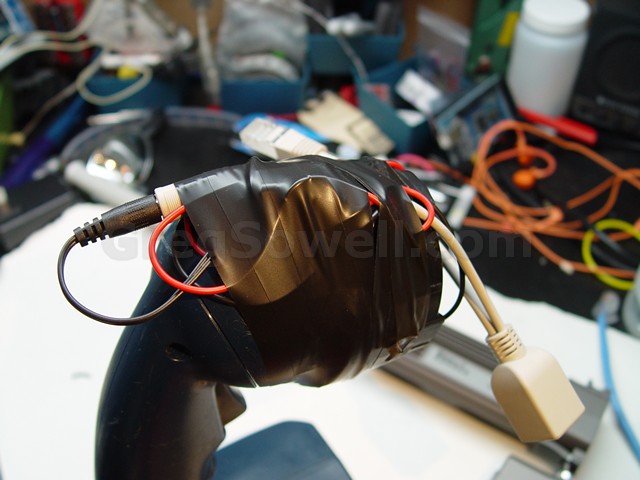
I used my 18v Ryobi drill set as a power supply. The set I have comes with a flashlight…which I have never actually used. You could gut the light and permanently make it a PSU, but I wanted to convert mine in such a way that it could switch back to being a flashlight if I wanted.
Luckily the Ryobi flashlight actually supplies all 18vs to the bulb, so we can just remove the bulb and tie in there:
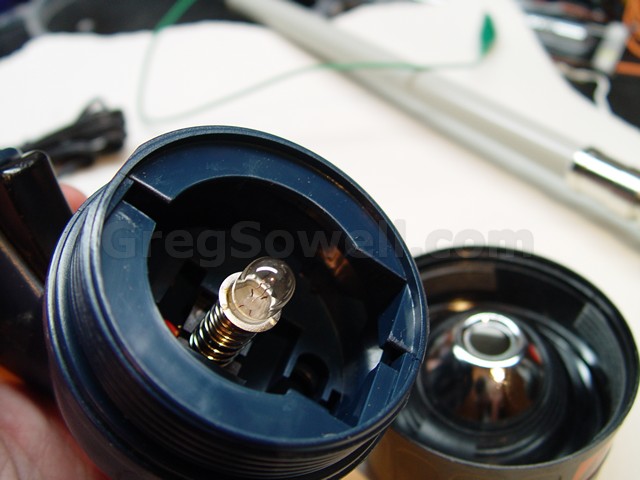
Simply unscrewing the cover shows the bulb.
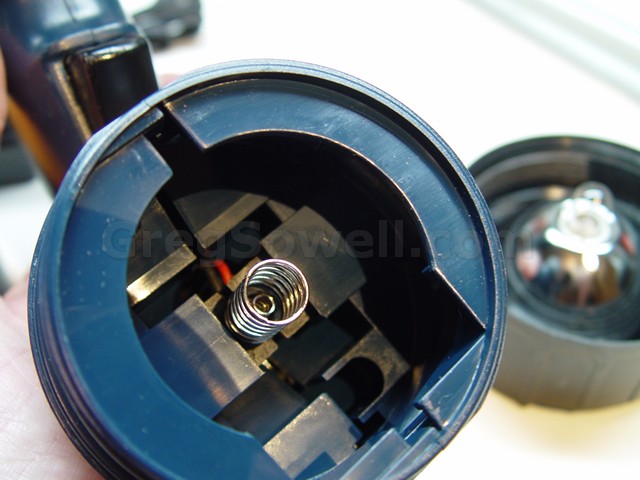
Positive is an inner spring and negative is the outer spring…pretty simple.

Simple alligator clips.
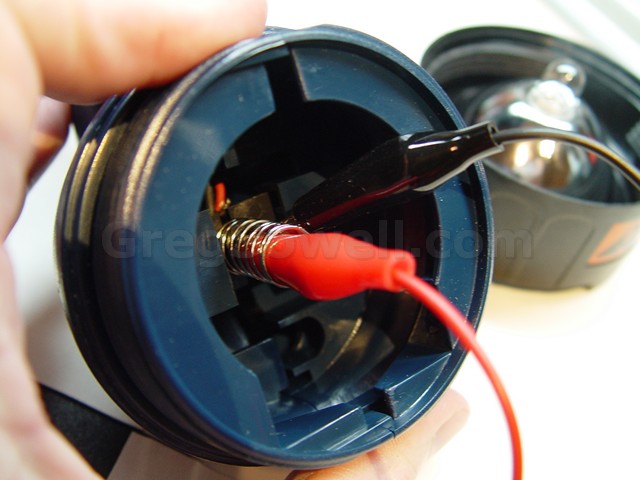
It is as easy as hooking the red to the center post, then clipping the black to the outer spring.


I went ahead and screwed the outer ring back on.

taping the leads down so they won’t run away.
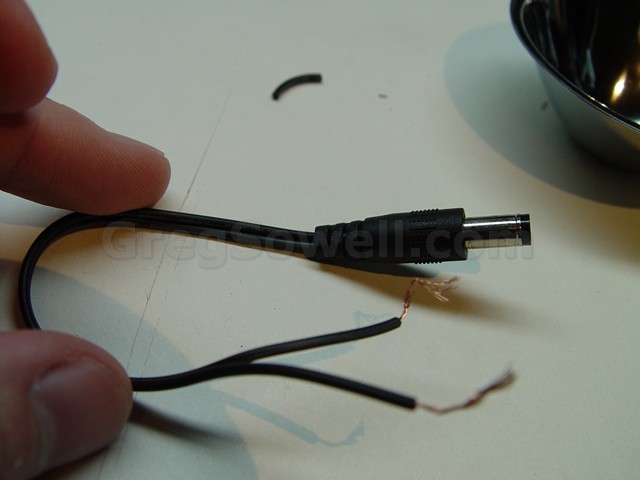
I cut the leads off of the wall wart. The thick white striped wire is the center positive. If you are unsure you can always use your continuity tester.

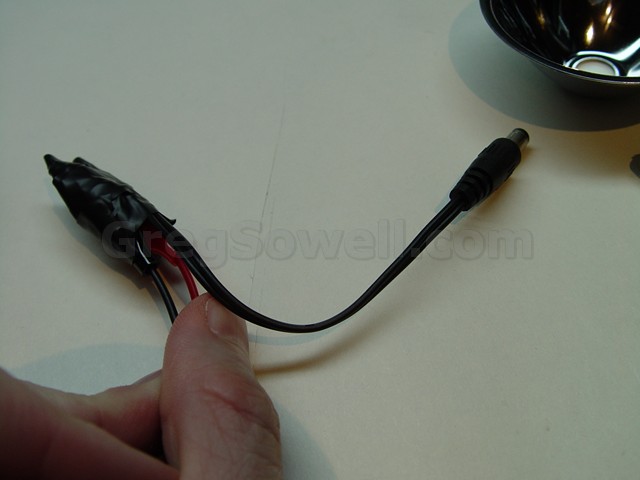
Clip to the plug and tape them over.

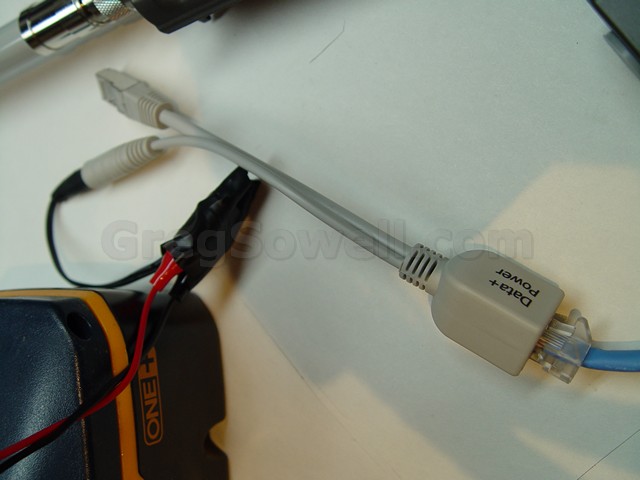
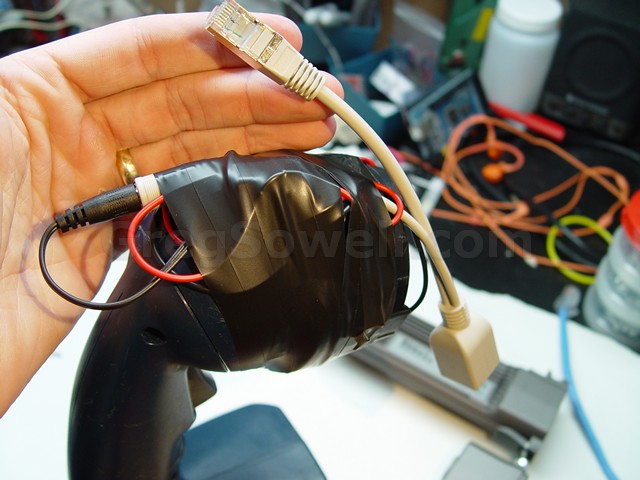
Plug the POE adapter in and hook up the radio.

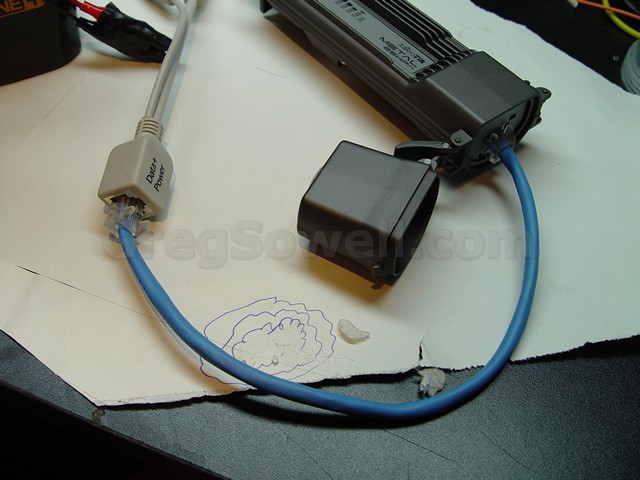
IT WORKKKKKKS
A little more tape.
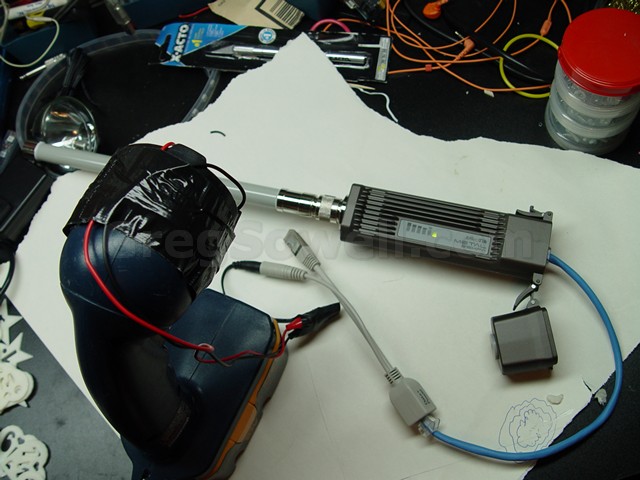
Obviously if I planned to take this around a client I would clean it up. I’m really going to just use it to walk around outside of properties and test with it in that fashion.
I’ll take this and ziptie an 8 foot piece of PVC pipe to it. I’ll then attach the AP to the end and go to town.
Let me know what you have MacGyvered in the past to test with.
If you are connecting your Internet routers to your providers via BGP, you will quickly notice that it is difficult to view the route table…and when a normal feed is 510K+ routes, I’m sure you can imagine why. A single full feed consumes somewhere around 256MB of RAM…so don’t try this with an RB750! As Tom would say, “Get bigger rooters B*****s!”
At any rate, when you open winbox, go to ip route, you see this:
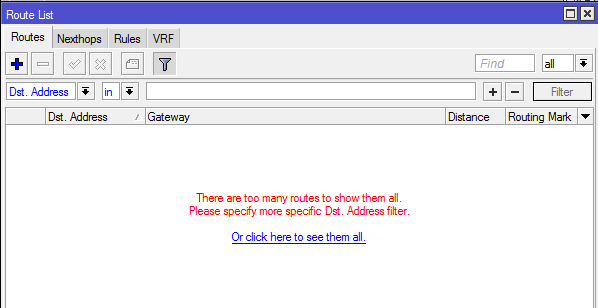
What you want to do is use some filtering. You will find this just above the list of routes…or lack there of:
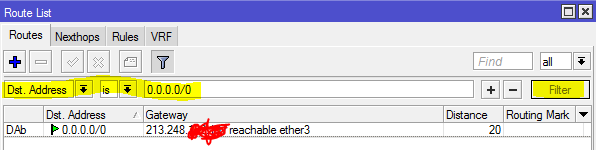
Notice that I used the “is” condition. This means it will look for this EXACT route.
If we want to put in a subnet and find all routes that are contained within it we would switch to the “in” keyword:
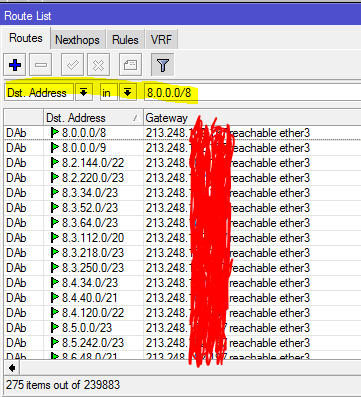
Notice it found 275 routes.
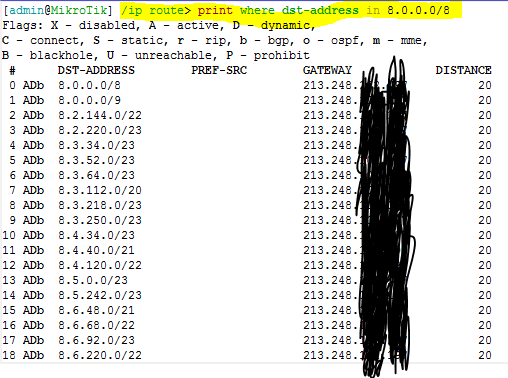
We can accomplish the same via CLI…with even more functionality actually, but we will keep it simple.
Exact match:
1 | /ip route print where dst-address=0.0.0.0/0 |

Match subordinate routes:
1 | /ip route print where dst-address in 8.0.0.0/8 |
On the CLI we can add some additional keywords…like detail!
1 | /ip route print detail where dst-address=0.0.0.0/0 |
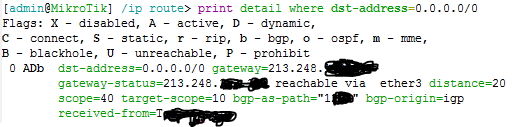
As you can see, adding the detail option gives us the BGP peer that we learned it from, their AS#, and gateway information. All extremely useful information.
Let me know about your route table tricks in the comments, and as always, happy routing!
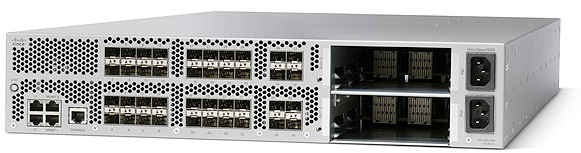
40 10Gb ports, of which 16 can run in 1Gb mode. Dual PSU with 5 fans.
I’m using a Nexus 5020, and attempting to trunk a 7606 running service provider code…but for some reason VLANs aren’t passing.
I issue the following on the 7606:
1 2 3 4 5 6 7 8 9 10 11 12 13 | 7606#show int te1/1 trunk Port Mode Encapsulation Status Native vlan Te1/1 on 802.1q trunking 1 Port Vlans allowed on trunk Te1/1 1650-1699 Port Vlans allowed and active in management domain Te1/1 1650-1653 Port Vlans in spanning tree forwarding state and not pruned Te1/1 1650-1653 |
This tells me everything is passing here…what happens when I do the same on the Nexus side:
1 2 3 4 5 6 7 8 9 10 11 12 13 14 15 16 17 18 19 20 21 22 23 24 25 26 27 28 29 30 31 | Nexus5020# show int e1/17 trunk
--------------------------------------------------------------------------------
Port Native Status Port
Vlan Channel
--------------------------------------------------------------------------------
Eth1/17 1 trunking --
--------------------------------------------------------------------------------
Port Vlans Allowed on Trunk
--------------------------------------------------------------------------------
Eth1/17 1,1650-1699
--------------------------------------------------------------------------------
Port Vlans Err-disabled on Trunk
--------------------------------------------------------------------------------
Eth1/17 none
--------------------------------------------------------------------------------
Port STP Forwarding
--------------------------------------------------------------------------------
--------------------------------------------------------------------------------
Port Vlans in spanning tree forwarding state and not pruned
--------------------------------------------------------------------------------
--------------------------------------------------------------------------------
Port Vlans Forwarding on FabricPath
--------------------------------------------------------------------------------
Eth1/17 none |
As you can see above, none of the VLANs are “STP Forwarding”…but what could be the problem?
It turns out that Nexus chassis have a new feature called Bridge Assurance. It is an enhancement that helps protect against unidirectional link failure. Any port designated as “spanning-tree port type network” has it enabled by default. It expects that the switch on the other end supports the feature and is sending crafted BPDUs over to you. If you happen to be trunking to a standard catalyst switch, then it basically blocks all VLANs from passing on the port! How do we work around it…by disabling it.
You have to globally disable the feature with:
1 | no spanning-tree bridge assurance |
.
Magically, your VLANs will begin passing:
1 2 3 4 5 6 7 8 9 10 11 12 13 14 15 16 17 18 19 20 21 22 23 24 25 26 27 28 29 30 31 | Nexus5020# show int e1/17 trunk
--------------------------------------------------------------------------------
Port Native Status Port
Vlan Channel
--------------------------------------------------------------------------------
Eth1/17 1 trunking --
--------------------------------------------------------------------------------
Port Vlans Allowed on Trunk
--------------------------------------------------------------------------------
Eth1/17 1,1650-1699
--------------------------------------------------------------------------------
Port Vlans Err-disabled on Trunk
--------------------------------------------------------------------------------
Eth1/17 none
--------------------------------------------------------------------------------
Port STP Forwarding
--------------------------------------------------------------------------------
Eth1/17 1,1650-1653
--------------------------------------------------------------------------------
Port Vlans in spanning tree forwarding state and not pruned
--------------------------------------------------------------------------------
--------------------------------------------------------------------------------
Port Vlans Forwarding on FabricPath
--------------------------------------------------------------------------------
Eth1/17 none |
This seems to be a little documented feature and generally takes a little google-fu to find it. Good luck and happy switching my friends.
![]()
Mike and Wilson went to Wispapalooza and did a quick live event talking about everything new they saw. Joining in on the call was myself(Greg), Miller, Tom and JJ.
Some of the things discussed:
RF Elements Antennas
New Unifi Controlling everything
Ubiquiti Rocket X5
Lots-o-random things inbetween.
To see the video please visit the link below!!!
![]()
RadiusManager by DMASoftlabs is a cheap, easy to use radius front end that will authenticate pppoe, hotspot, whatever accounts. One downside is the support isn’t the greatest. You occasionally have to do some hacking on your own.
The particular fix I made with this script is that if you have date expiration customers(as in they have access for a month at a time), and they add credits before they expire…it does nothing. It doesn’t extend their expiration date…nor does it add credits. It just eats their money. Needless to say, users aren’t happy about it.
So this script is meant to be run once a day around 11:57PM. It will look in the financials for anyone who made a purchase that day, but had 0 days added to their total. It will then take the number of months they purchased, and that to their existing expiration date. It then emails you the list.
1 2 3 4 5 6 7 8 9 10 11 12 13 14 15 16 17 18 19 20 21 22 23 24 25 26 27 28 29 30 31 32 33 34 35 36 37 38 39 40 41 42 43 | <?php
$servername = "localhost";
$username = "username";
$password = "password";
$dbname = "radius";
// Create connection
$conn = new mysqli($servername, $username, $password, $dbname);
// Check connection
if ($conn->connect_error) {
die("Connection failed: " . $conn->connect_error);
}
echo "Connected successfully";
//days is the number of days the transaction added. Expiration is the date currently set as expiration. Amount is the number of months they just purchased.
$sql = "SELECT username, date, days, expiration, DATE_ADD(expiration, INTERVAL amount * 4 WEEK) as expirationNew, amount, price FROM rm_invoices WHERE days='0' AND date=CURDATE()";
$result = $conn->query($sql);
$message = "";
if ($result->num_rows > 0) {
// output data of each row if there were 1 or more
while($row = $result->fetch_assoc()) {
$sql2 = "UPDATE rm_users set expiration = '" . $row["expirationNew"]. " 00:00:00' WHERE username='" . $row["username"]. "'";//update the users with their new expiration date.
// echo $sql2;
if ($conn->query($sql2) === TRUE) {
echo "Record updated successfully". "\r\n";
} else {
echo "Error updating record: " . $conn->error. "\r\n";
}//message to be added to the email.
$message = $message . "username: " . $row["username"]. " - date: " . $row["date"]. " - days: " . $row["days"]. " - Original expiration: " . $row["expiration"]. " - New expiration: " . $row["expirationNew"]. " - amount: " . $row["amount"]. " - price: " . $row["price"]. "\r\n";
echo "username: " . $row["username"]. " - date: " . $row["date"]. " - days: " . $row["days"]. " - expiration: " . $row["expiration"]. " - expirationNew: " . $row["expirationNew"]. " - amount: " . $row["amount"]. " - price: " . $row["price"]. "\r\n";
}
$eSubject = "Radius Expire Update - " . $result->num_rows;
} else {
echo "0 results". "\r\n";
$eSubject = "Radius Expire Update - 0";
}
$headers = 'From: [email protected]';//setup from address
mail('[email protected]', $eSubject, $message, $headers);//send the email
$conn->close();
?> |